Tax Accounting Tips
Invoice Ninja is a fully featured invoicing system with many small-business friendly features.
You can invoice your clients, sell products and services, quotes, purchase orders, auto bill payment methods, track time/tasks, projects, payments...
Some of our features which can help with accounting include:
- Expenses: Track any type of expense, track tax(es) paid per expense, currency conversion, track expenses per vendor and client. See Expenses
- Recurring Expenses: Any expense can be made into an expense that automatically reoccurs on a set schedule. See Recurring Expenses
- Transactions: Connect your bank account to Invoice Ninja for automatic reconciliation of payments and expenses. See Transactions
- Payments: Track all payments received by your business, by customer. You can run reports on payments, clients, and keep track of reference numbers/payment methods. See Payments
- Reports: Generate highly customized and fine-tuned reports for your various records. You can track profits, sales, expenses, performance of your products and services, and either visualize that data directly, or export it for processing and analysis in an external application. See Reports
If your business uses Invoice Ninja for billing your clients, you may want to take advantage of the accounting features we'll describe below.
What is Cash Basis Accounting
Cash basis accounting recognizes revenues and expenses at the time the money is received or paid out.
For example, if you invoiced a client in November 2023 and your tax year is the calendar year ending December 31, 2023, but the client paid their invoice in February 2024, the revenue would be under the 2024 calendar year. Most small businesses use cash basis accounting.
Track all of your expenses
As a small business, whenever you have a business expense it's much easier to log it right away than trying to dig it up and remember what it was for at the end of the tax year.
You can enter each of your expenses in the Invoice Ninja Expenses module:
Enter a new expense
- If you want to track WHO you paid the expense to, attach it to a vendor.
- If the expense was related to a client or project, you can attach it to a client and project.
- You are able to categorize the expense by selecting or creating a category.
- Tax: if you are required to keep track of taxes you PAID on business expenses to claim input tax credits, you can do this by enabling Expense Tax under Settings > Tax Settings > Expense Tax Rates.
- You can even layer up to three calculated tax rates. See Tax Settings for details on tax configuration.
Example use cases
- John's business pays a total of $100 for an item purchased by the business which included 13% sales tax. He creates an expense in Invoice Ninja, enters the total amount as $113, selects the 13% Tax option, and selects Inclusive Taxes. The expense total was 113.00 which included 13% tax. Now the amounts and taxes paid will be accurately reflected on reports.
- John's business uses the Recurring Expense feature to log the company internet bill which is $123 each month which includes 13% sales tax. Since the internet provider charges the company card automatically, John selected the option “Mark Paid” when creating the recurring expense so that it's marked as paid automatically.
- John manually enters an expense record for when he pays his New York utilities bill. He set the vendor as ‘City of New York' and category as ‘Water Bill'. He is later able to track his expenses paid to the City of New York, or by the Water Bill category. On his year-end Profit and Loss report, the categorized expenses will be reflected accurately.
Sales tax collection
If you are collecting sales tax, ensure you have the tax rates configured properly in Invoice Ninja. See Tax Settings for details on tax configuration.
Once your tax rate(s) are added, you would apply tax to your products/invoices. If certain items sold are exempt from sales tax, it's easy to mark a product as Tax Exempt, or taxable at 0% in case you are able to claim input tax credits on it.
Transactions
You can link your bank account to Invoice Ninja and have it sync your transactions for bookkeeping purposes. See Transactions for how to set this up.
You can import your transactions on demand, or with automatic syncing, which will keep all of your transactions up to date. You also have the option to import bank statements in CSV format.
Or, if you need to, you can enter transactions manually by yourself.
Whether the transactions are added manually, imported, or synced from your bank account, you have the ability to categorize them as Deposit or Withdrawal, set the currency, bank account, and description.
Once a deposit transaction is recorded in Invoice Ninja, you have the ability to link it to an existing payment, or create a new payment record from the transaction. If the transaction is a withdrawal, you can link it to an expense record.
Payments
Payments are records of all invoice payments your business receives. When a client pays an invoice online via Invoice Ninja, a payment record will automatically be created and linked to that client and invoice.
You are able to manually record payments (for example, if client paid with cheque). Each payment is linked to an invoice. The invoice module checks the payments linked to the invoice to determine if the invoice is outstanding (payment amounts < invoice total amount).
Reports can be run on payments which can filter the dates, clients, invoices, amounts, etc. Since each payment must be linked to an invoice, taxes are not set on the payment level – the tax rates used for reporting are based on the invoice.
Financial Reports
You can generate customized reports for your various records in Invoice Ninja.
If you consistently entered all your expenses and payments received in Invoice Ninja throughout the year, at the end of the tax year when you need to calculate the total revenues, taxes collected, expenses, and profit amounts to your tax agency, it's easy to accomplish with the built-in reports.
Profit and Loss Report
See Reports: Profit and Loss Report
Manual Calculations
If you do not wish to use the Profit and Loss report, you can run a combination of reports manually.
Payment
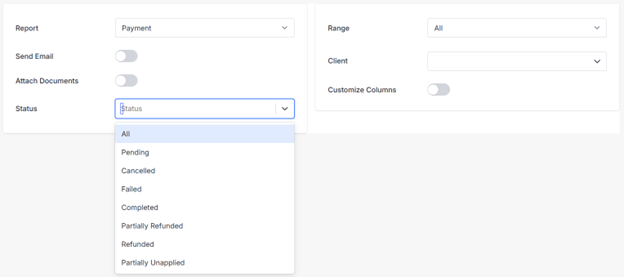
- The Payment report can be used to tally up all received payments in the chosen date range.
- You can open the CSV in Excel, click to select the entire Payment Amount column, and the Sum will be displayed in the bottom right.
- NOTE the sum of payment amounts won't suffice for you if you've received payments in multiple currencies. The Profit and Loss report automatically converts payments to your company's default currency.
Expense
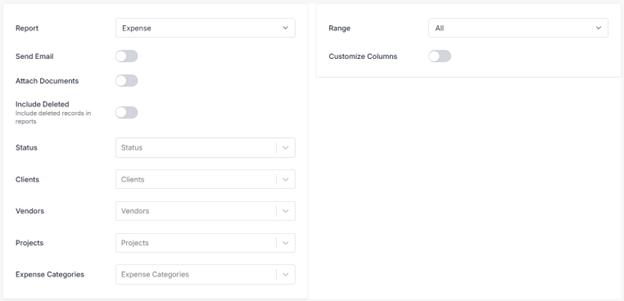
The Expense report can be used to tally up all expenditures in the chosen date range. You can further filter by expense types etc.
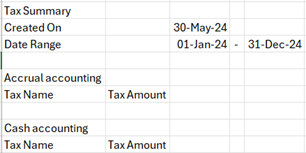
Tax Summary Report

The Tax Summary Report can be used to see a total of all the taxes collected in the chosen date range, broken down by each tax rate's name and rate. You may wish to use this report for calculating your input tax credits if you collect multiple rates.
Other Reports
There are a number of other reports available for product sales, invoices by client, credits, quotes, purchase orders, and more. See Reports
Calculations
If you've logged all your expenses, payments received, and taxes collected in Invoice Ninja, the fiscal year-end should be a breeze since it can be calculated at any time with the reports described above.
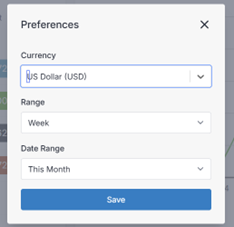
Dashboard
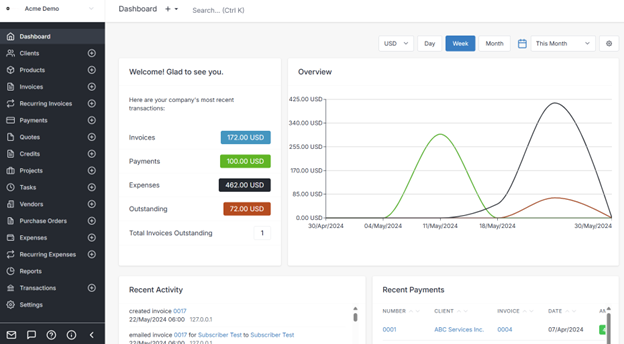
Clicking the settings gear in the top-right of the dashboard allows you to select the date range for the chart, as well as currency (if you bill in different currencies).
The Invoice Ninja dashboard features a chart displaying your invoices, payments, outstanding, and expenses.
Hovering over any point on the chart will show the pop-up calculations:
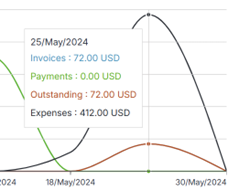
Note that the amounts shown in the dashboard report include sales taxes collected.
Disclaimer
Disclaimer: this article is not any form of tax advice. It is simply describing Invoice Ninja's capabilities and configuration. For tax advice consult a tax professional.