Clients
Video on adding a client:
Creating Clients
There several ways for a client to be created, including:
- Clients > + Client
- Settings > Import | Export > Client CSV Import
- Client Portal (if client registration is enabled on Settings > Client Portal)
- API Integrator: Zapier, Integromat, APISync, or manual API calls developed using the API Documentation.
A "Client" can either represent a person or a company. If only the contact information is set the contact name will be used as the client's display name. If the client's name is set then it will be used instead.
There are three different client id fields:
- $client.id : Autogenerated and used by the API (ie, 7WR07SC)
- $client.number: Autogenerated and can be configured on Settings > Generated -Numbers (ie, 0001)
- $client.id_number: Standard field which can be used to store the client’s number from a different system
Quickly Create a Client
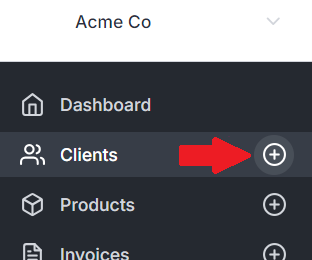
The simplest way to add a new client is to click the + in the navigation:
Viewing Clients
To view a client, select one from the list of clients on the client panel, or by linking to it from a related invoice, project, task or transaction.
Overview
The overview panel presents a quick look at the client's company details, address, contacts, paid to date, the outstanding balance of a client, public and private notes about the client, followed by a list of interactive buttons to see a client-filtered list of any category.
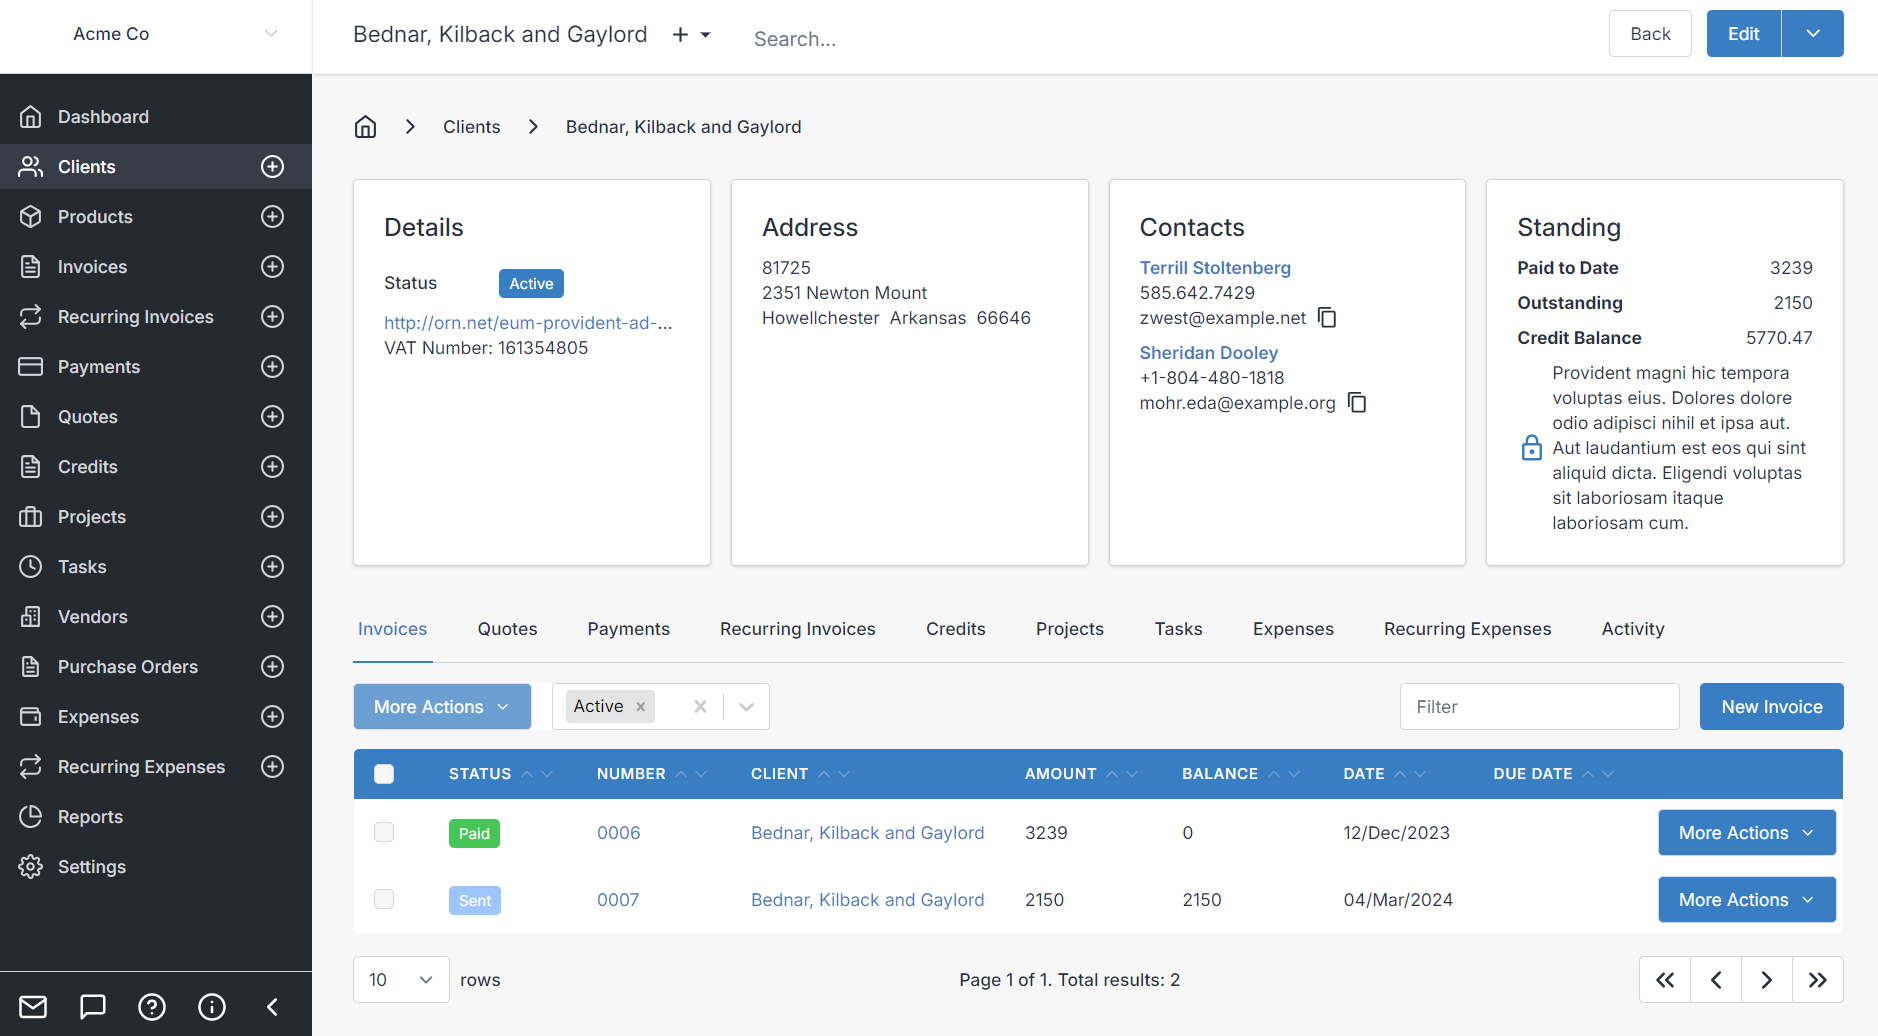
You can select from Invoices, Quotes, Payments, Recurring Invoices, Credits, Tasks, Expenses, Recurring Expenses, or Activity.
Creating Item Under a Client
React:
Select the category, and the New x button, ex. New Invoice. For example, to create a new invoice for the current client:

Flutter:
Hover your mouse over one of these categories and long press (click and hold), this will take you to create a new invoice, quote, payment, etc. On mobile devices, you can touch and hold anywhere on the button to create new, instead of viewing a client-filtered list.

Quick Access Menu
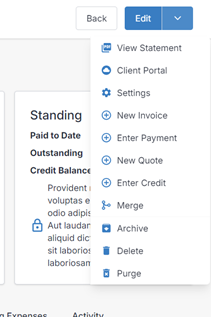
The top-right of the navigation bar has a quick access dropdown that allow you to quickly perform actions for this client including navigating to the Client Portal or the client Settings where you can edit and configure client-specific rules, templates, behavior, etc.
Activity
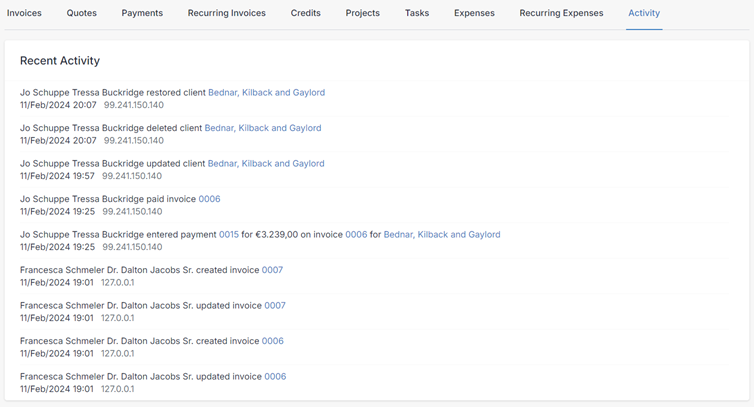
The Activity panel provides a chronological overview of transactional and non-transactional activities related to the client. It tracks history of debits and credits on the client's account, new records or record modifications to the client record, or invoices, quotes, etc. that are connected to the client, and which users performed those actions. The Activity panel is useful for accountability within your business, and monitoring who did what, and when.
Objects in the Activity panel are shortcut links, and clicking on them will bring you to the record or transaction that they describe.
Editing Clients
There are two ways to edit a client:
- If you're on the Client Overview screen: use the Edit button in the top right corner of the panel
- If you're on the list of all clients: scroll to the right and select Edit from the More Actions dropdown (or the Edit pencil icon if appears)
On mobile you will see a list of tabs at the top menu, for different sections to edit client data.
Most of the information in a client entry or edit form is entirely optional, and some is automatically generated. Your own business practices should dictate what sort of data you gather from your clients.
Company Details
- Name - Client name, can be the name of an individual, group, organization, or business. If a name is not chosen, but a contact entry with first/last name is provided, the first contact's name will be used as the client name.
- Number - This number is automatically generated by Invoice Ninja, for tracking purposes. Rather than editing the numbers manually, we would suggest to edit the behavior of generated numbers under Settings > Generated Numbers > Clients.
- ID Number - The ID number field is optional. You can use this to reference a client's ID number as it pertains to your business, such as a membership ID number.
- VAT Number - The VAT number field is a Value Added Tax ID number which applies mostly to countries from the European Union who need to track this sometimes for tax purposes.
- Website - Your client's website, optional, and for reference.
- Phone - Primary phone contact number for the client, organization, or business, separate from any individual contact's phone number within the client entry.
- Routing ID - Used for storing the eInvoice routing number which is assigned as an address to locate this client when delivering eInvoices.
- Valid VAT Number - Check this if a valid VAT number is supplied because in some jurisdictions, this may change the way tax is applied to the client (only works when "Calculate Taxes" is turned on under Settings>Tax Settings.)
- Tax Exempt - This only works when "Calculate Taxes" is turned on under Settings>Tax Settings. It will result in no taxes being applied by default for invoices created for this client.
- Classification - This is for optionally storing the type of customer this is for your own purposes. Options in the dropdown list are: Individual, Business, Partnership, Trust, Charity, Government, Other.
Contacts
Every client has a contacts list, allowing you to add as many contacts as you like to represent any given client. When viewing a client, you can see existing contacts under "Details" panel. When editing a contact they will be listed under the Contacts panel.
From the admin portal, you will see the button Add Second Contact to expand the contact list with a new contact entry. You can only add new contacts to a client from the admin portal. Customers cannot add more contacts to their client entry from the client portal themselves.
- First and Last Name - Name details for the individual contact. Invoice Ninja automatically uses the first contact's name information to populate the client name if one is not provided.
- Email - Email address associated with the client, and used as their log in credential for the client portal.
- Phone - For reference, phone number contact information for the individual contact.
- Add to Invoices - Whether to include this contact on invoices and quotes by default.
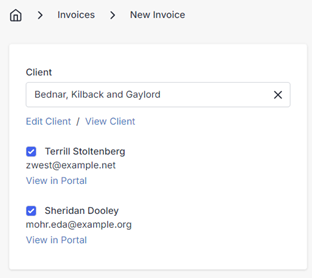
When making an invoice or quote, you have the ability to email it to multiple contacts at the same time. The client's contacts who have Add to Invoices checked will be automatically included on new invoices/quotes, like this example:
Address
Billing Address
Standard address information fields are available here to enter a billing address for your clients with. This information is usually also included on any invoices and other documents for the client.
Shipping Address
Just like the billing address, standard address information fields are available here to enter a shipping address for your clients with. Additionally, you can use the Copy Billing button below these fields, to simply copy the billing address information into the shipping address fields as well.
Locations
You can add multiple locations to a client. These locations can be used to store different address information for the client, such as a different billing address or shipping address.
Locations can be added to the Invoice / Quote / Credit / Recurring Invoice from their respective edit pages. These locations will override the client's default billing or shipping address for the specific invoice. This is useful if you have a client that has multiple locations, or if you need to send an invoice to a different address than the client's default billing address.
Settings
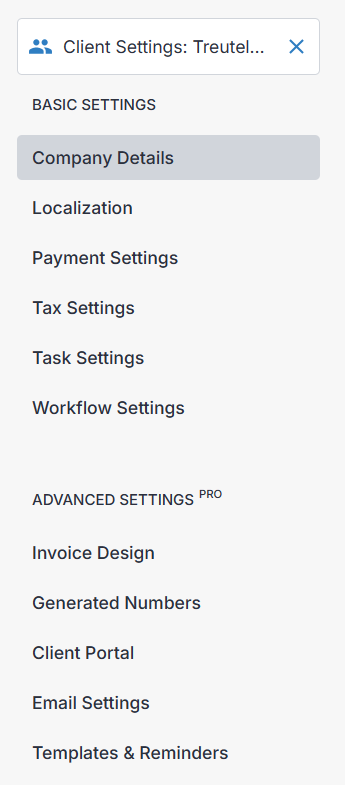
By clicking Settings from the edit client dropdown, you can tailor any setting to the client, including payment settings, tax, currency, invoice design, email templates, and more:
Additional Info
Settings
- Currency - Default currency to apply to invoices and payments for this client.
- Language - The preferred language of your client. Invoices and other documents will be generated in the client's preferred language.
- Payment Terms - Set a default invoice payment term length, if you have agreed on payment arrangements with your client on a regular basis.
- Quote Valid Until - Set a default term length for quotes given to your customer that you will honor the price in your quotes for.
- Task Rate - Set a default hourly rate for Tasks that are performed for the client.
- Send Reminders - Enable or disable email reminders to the client for things such as unpaid invoices. Set fine tuned rules for the behavior of email reminders under Settings > Templates & Reminders.
Notes
- Public Notes - Any public notes about the client, public notes are typically included on any future invoices, quotes, or other documents generated for the client.
- Private Notes - Private notes are any comments about the client that will only ever be viewable by users on the admin portal.
Classify
- Size - Used to describe the size of a client that represents an organization, school, or business.
- Industry - Add further description to your clients to describe the type of industry they are involved in.
Documents
The Documents panel provides the ability to upload documents and view documents you have linked to the client. These uploaded files are accessible through the admin portal, or through the client portal for your clients to view themselves. A useful way to employ the document uploads feature, is by uploading terms of service documents, contracts, or other files you would like to share with the client for any other reason.
Note for self-hosted users: that uploaded documents are saved in the "public/storage" directory in a folder structure using hashed folder names to match the product entry, so backup this directory along with your database to preserve your attached documents.
Contacts and the Client Portal
Contacts are each given their own profiles in the client portal, logging in with the emails you assign them, allowing each contact to set their own password and personal settings or details on the client portal, regardless of which client they represent.
When an individual self-registers on the client portal, their name and email will be added as contact data under a new client. After signing in, they will have the opportunity to edit their client details in the "Profile" menu, such as company name and contact information.
Email addresses for contacts are considered authentic. For example, if an individual attempts to self-register while already being included as a contact for another client entry, the self-registration portal will force them to resubmit their personal information using a new email address, or have their email address removed from the other client listing.
See Client Portal
Group Settings for Client Management
If many clients share the same settings, for example, the same currency or email reminder settings, you can create a group on Settings > Group Settings to, apply a standard set of settings to a large group of clients.
For most settings, the app will first check if the client has a value in place, if not it will check if the client belongs to a group and if that group defines a value. Finally, it will use the default value set at the company level.
The benefit of using groups is that if in the future you need to change the setting you can change it one place rather than having to update multiple clients individually. Without groups, bulk updating client settings would require using the API or an integrator.
Custom Fields
Sometimes you need extra fields to populate additional information for your clients. With Invoice Ninja you can add up to 4 custom fields for both the client and also each contact of the client.
To create a custom field navigate to Settings > Custom fields. Advanced features including being able to include these custom fields on the invoice PDF by using the placeholders:
Client placeholders
$client.custom1
$client.custom2
$client.custom3
$client.custom4
Contact placeholders
$contact.custom1
$contact.custom2
$contact.custom3
$contact.custom4