Vendors
The Vendors module allows you to manage a list of vendors that your organization purchases goods or services from for business-related purposes. You can enter all necessary contact and billing information for each vendor, and track individual purchases through expense records which are linked to the corresponding vendor record. Managing vendor records is crucial for effective management of your business or organization.
Vendors are used in Purchase Orders (required), and Expenses (optional). That means you can track both purchasing and expenses to specific vendors.
Vendor Module View
When you select the Vendors module from the navigation menu on the left side of the admin portal, you are brought to a table view of all current vendor records.
The table view allows you to sort vendors by column types, add/remove columns and filter to view archived or deleted vendors.
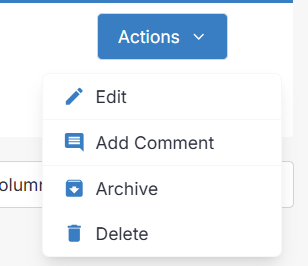
You can also create new vendors from this screen. Each vendor in the table will have an "Actions" menu to the right of its entry in the table, where you can manage the vendor record or take actions such as editing, adding comments, archiving and deleting.

Actions Dropdown

Viewing a Vendor
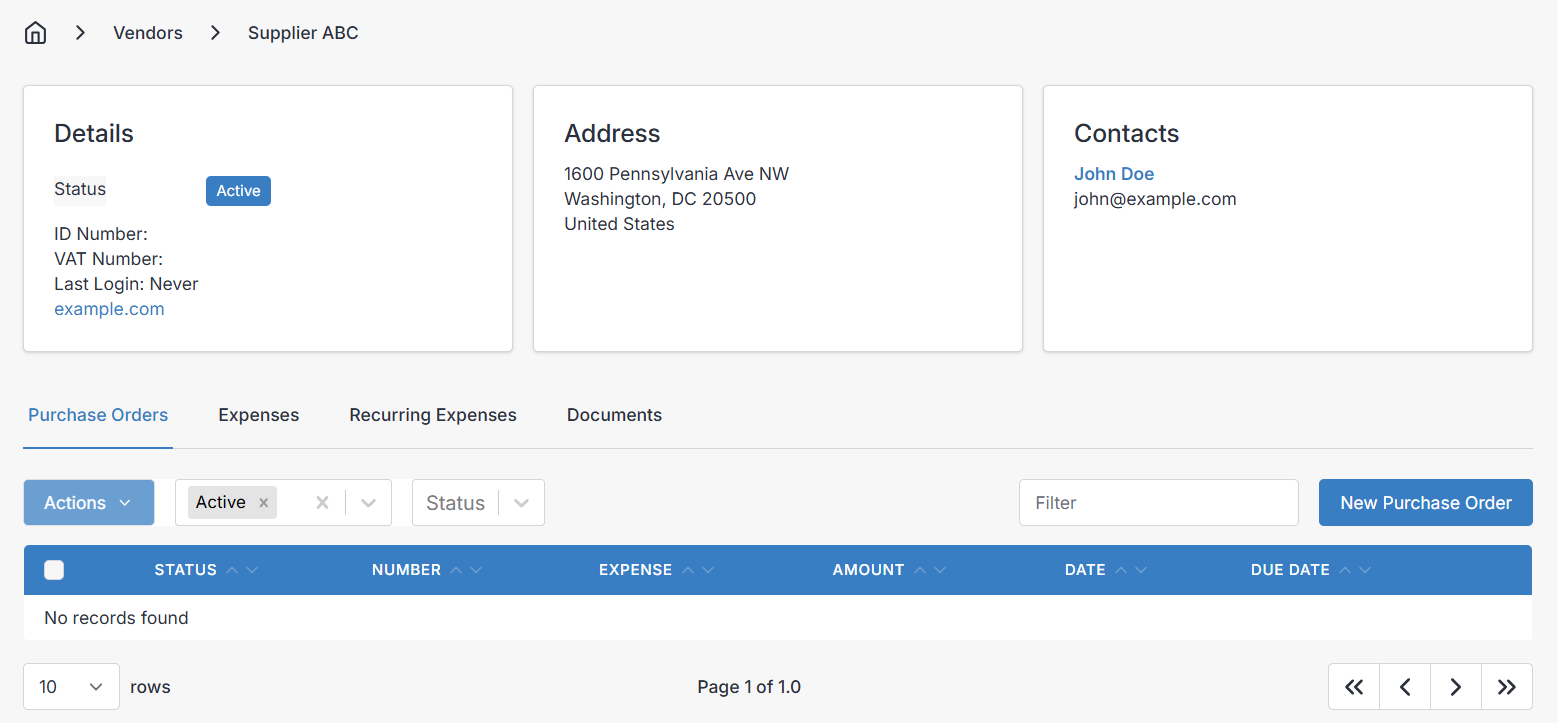
To view a vendor's details, select it from the table view. The vendor's information will be displayed in several panels/tabs.

Purchase Orders
A list of purchase orders linked to the vendor is shown.
Expenses
A list of expenses linked to the vendor is shown.
Recurring Expenses
A list of recurring expenses linked to the vendor is shown.
Documents
Here you can upload files such as pictures, documents, and more to link to your vendor record. This will only be for your purposes in the admin portal however.
Creating and Editing a Vendor
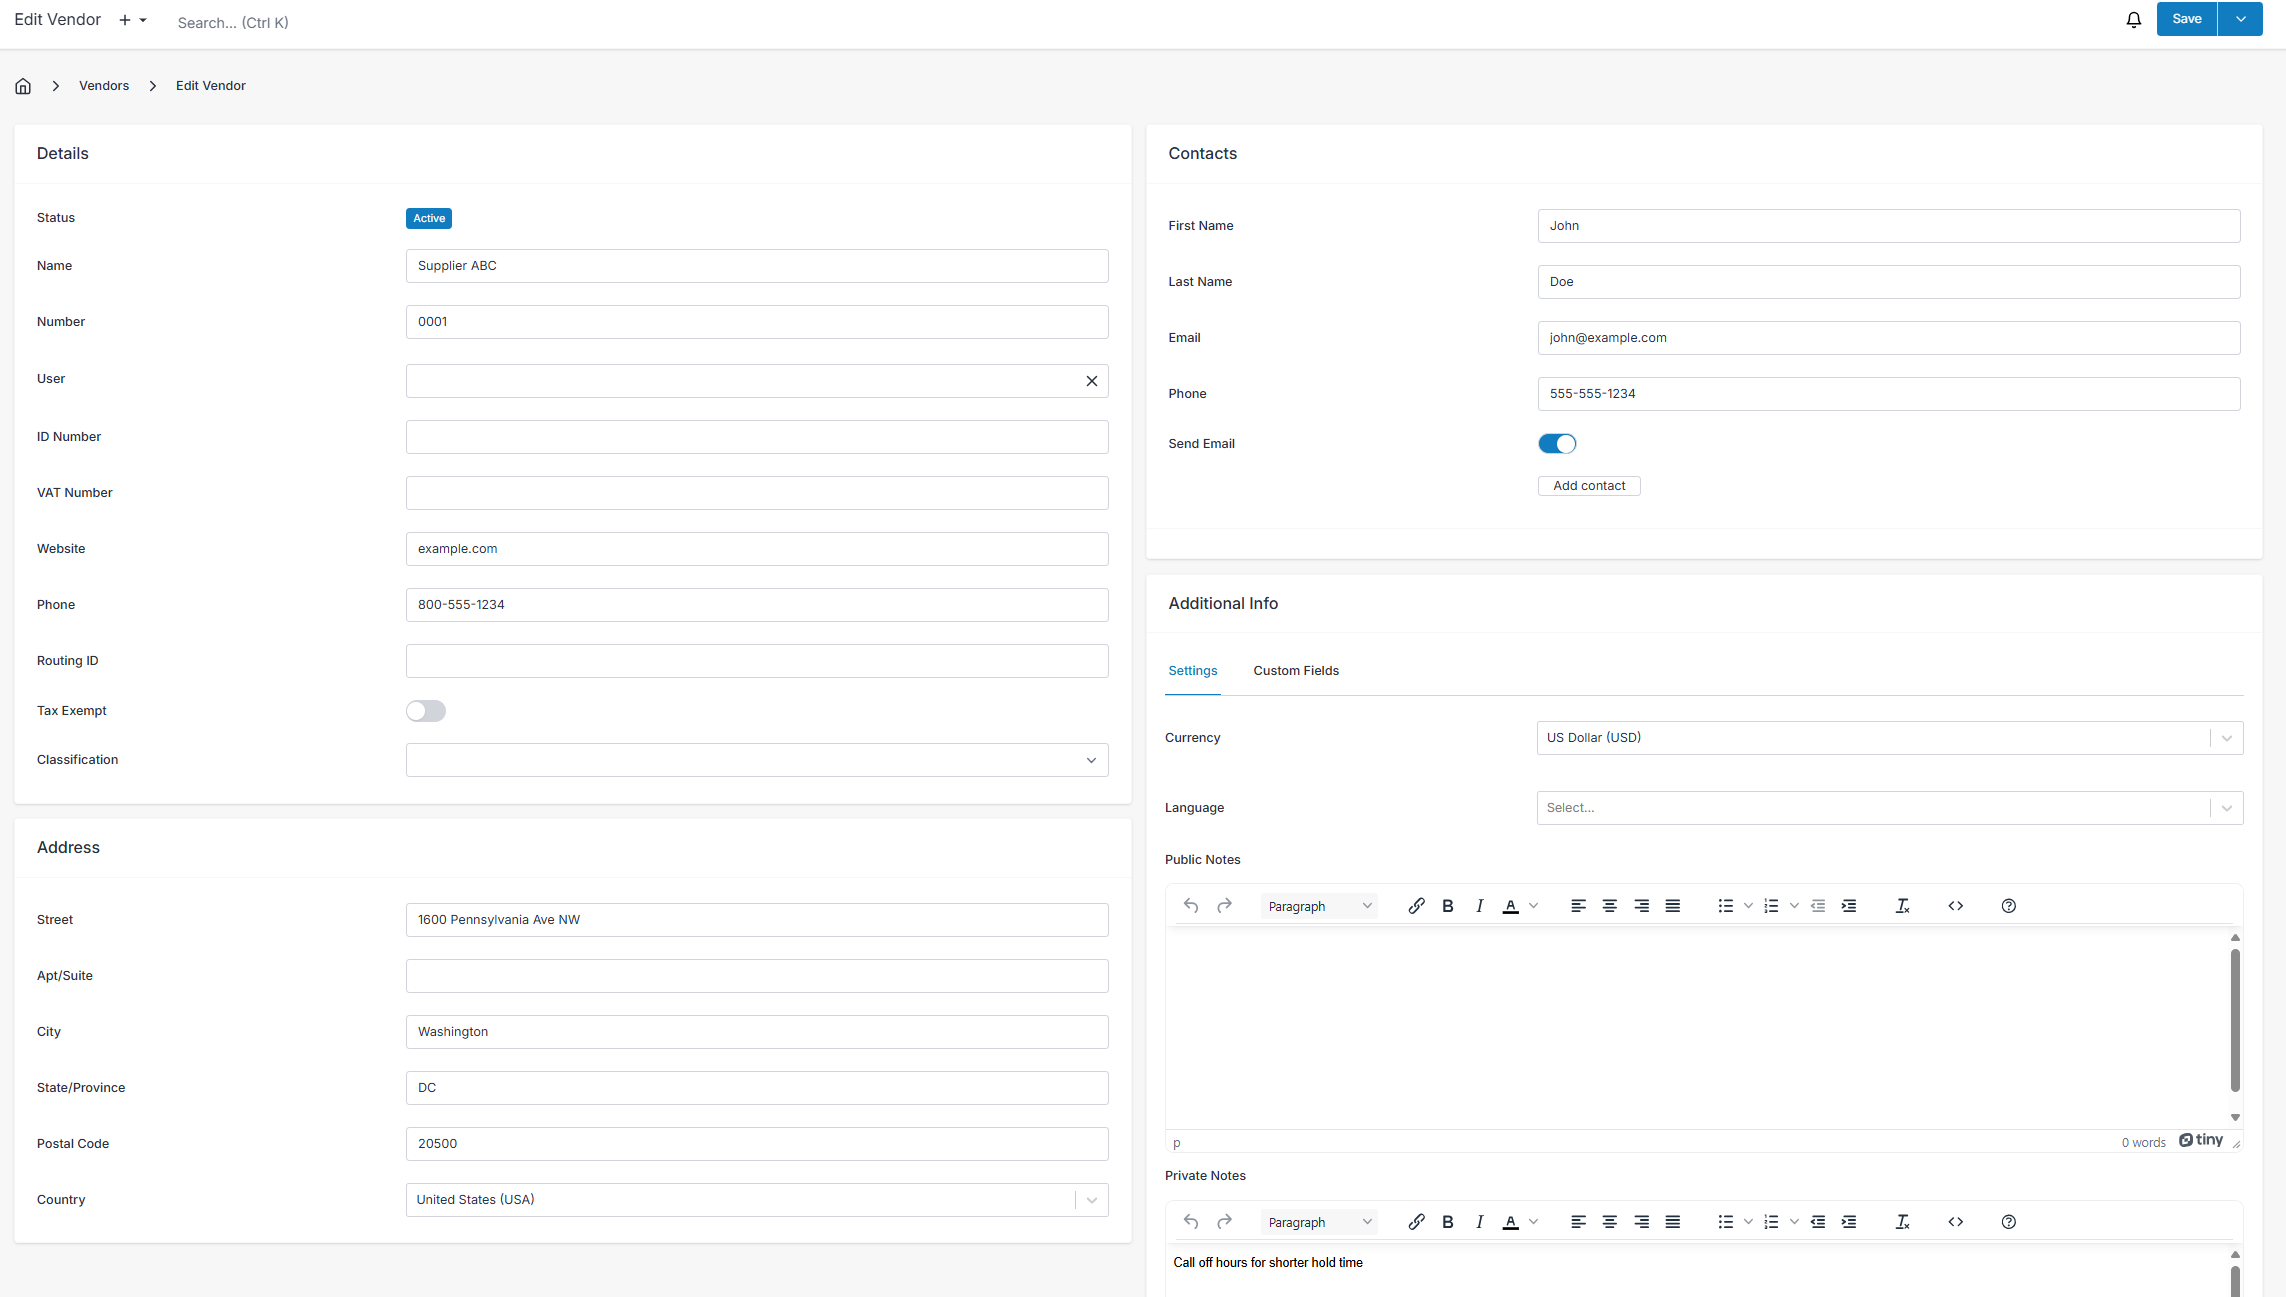
Creating and editing a vendor in the desktop layout will take you to a new screen with all available fields presented in one view. On the mobile layout it is broken down into tabbed sections, similar to the way they appear in desktop layout, as follows:

Details
- Name - Enter the name of your vendor here.
- Number - This is a generated number for your record keeping purposes to identify different vendors in the system. Customize the number patterns under Settings > Generated Numbers.
- ID Number - An optional and generic field for business ID numbers wherever applicable.
- VAT Number - An optional field to support recording "Value Added Tax" numbers for countries like those in the European Union which require tracking this for tax purposes.
- Website - The website of your vendor can be entered here.
- Phone - A primary contact phone number for the vendor.
- Routing ID - Optionally store the Bank Routing ID of the vendor.
- Tax Exempt - In the future this setting will apply to E-Invoicing.
- Classification - An optional dropdown where you can classify the vendor type.
Address
Billing address details for your vendor can be entered here for record keeping purposes.
- Street - The street number, and street name.
- Apt/Suite - Apartment or suite number.
- City
- State/Province
- Postal Code
- Country
Contacts
You can add as many contacts as you like to a vendor record, to represent individuals or departments you may need to contact at some point from the vendor.
- First Name & Last Name - A first and last name for an individual, or simply enter a department name as a first name.
- Email - The preferred email address for the contact.
- Phone - The preferred phone number for the contact.
- Send Email - Check this if the contact is to be included on Purchase Order emails by default.
Additional Info
Settings
- Currency - Set the currency in which the vendor charges your company. This will be the currency used on purchase orders created under this vendor.
- Language
Notes
- Public Notes - Will populate the public notes on purchase orders created for this vendor. This is a good placeholder for general descriptions of a vendor or notes to be included by default on each purchase order.
- Private Notes - Only viewable by admin portal users, you may use this field to leave private comments about a vendor for yourself and your coworkers.
Custom Fields
Here you can use any custom fields you configured under Settings>Vendors>Custom Fields
Want to contribute? Edit this page on GitHub!