Payment Gateways
Invoice Ninja integrates with many "payment gateways" (AKA, merchant processors). A payment gateway allows merchants (that's you!) to accept credit cards and other electronic payments online directly from invoices you email out to your clients.
See our Payment Gateway Integrations
- Invoice Ninja includes deep integration with a range of high quality payment gateways, allowing you to get paid fast and across many different gateways.
- Payment gateways can be setup in Settings>Payment Settings>New Gateway. From there, you will choose your payment gateway and click Setup.
- When you create or edit a payment gateway there are three tabs of settings to configure. Credentials, Settings, and Limits/Fees.
- You cannot accept online invoice payments without first setting up a payment gateway.
- The easiest way to start accepting online payments is via Stripe. Stripe is the largest online payment gateway provider with the most currencies.
- Simply select "New Gateway," Stripe Setup, then you will be taken to the Stripe login screen to link your account. If you do not have a Stripe account already, Stripe will guide you to create an account right away.
You can easily setup payment gateways within your account under Settings>Payment Settings>"New Gateway"

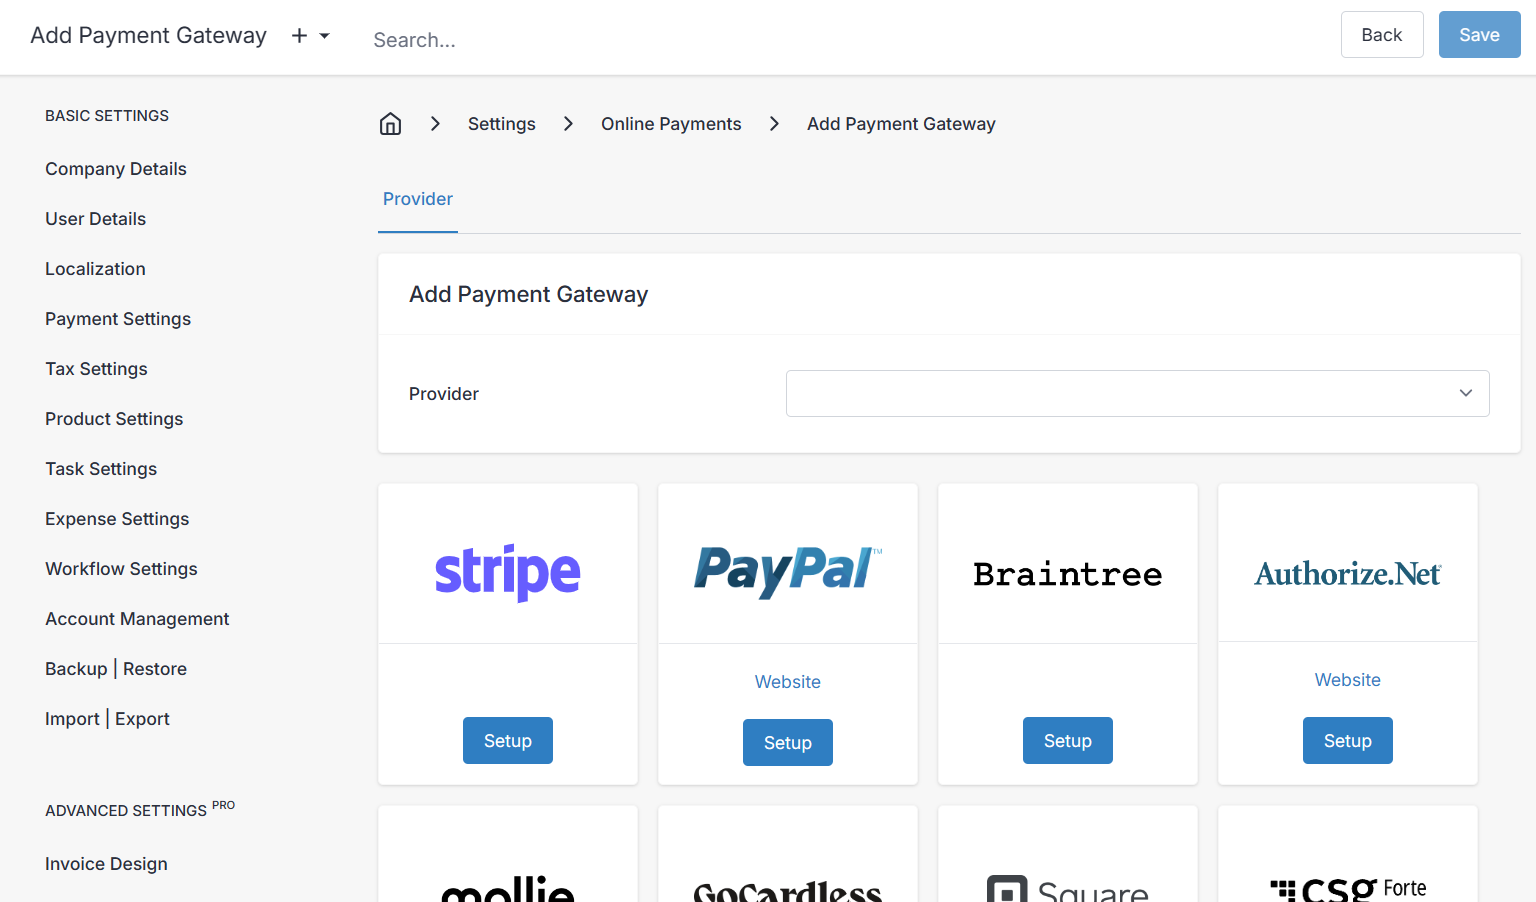
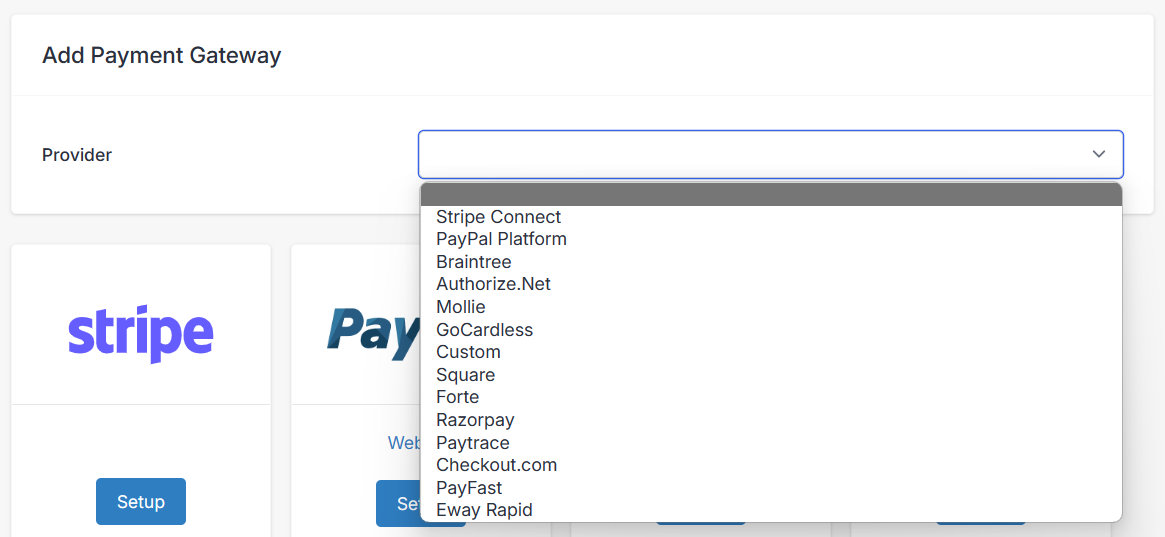
- You can also integrate multiple gateways for different payment types. For example, you can configure Stripe for your ACH payments, Auth.net for you credit card payments and also PayPal. Gateways can also be configured based on a minimum or maximum amount, giving you maximum flexibility.
- Gateway fees can also be configured and passed on to the client when they perform transactions. For Stripe, Invoice Ninja can even auto calculate the fee amount to pass on to the customer if you enable this option.
Credentials
In this first most important pane, you define the necessary values in order to facilitate communication between Invoice Ninja and your payment gateway's API.
Settings
These settings govern some of the behaviors within Invoice Ninja's client portal, or admin portal, when looking at and interacting with your configured payment gateways. Some of these options may or may not appear depending on your payment gateway type.
- Label - This label is for internal reference purposes only, and applies to the payment gateway list on the admin portal.
- Capture Card - Setting to save client credit card details for next time or not. Enabled, or disabled. Otherwise set to "Enabled by Default" or "Disabled by Default" to give the client an option at checkout to "Save payment method details" for later.
- Available Payment Types - You will see a different list of supported payment methods, depending on the payment gateway service provider you chose. Eg. Credit Card, Bank Transfer, Alipay, Apple Pay, PayPal, etc. Enable or disable these options to give clients access to those payment methods at checkout.
- Required Fields - Tick the box for any field you wish to request the client to fill out for the payment records. Optionally, update the client record in Invoice Ninja with the client's additional information you requested.
- Accepted Card Logos - Determines which logos are displayed during checkout. Enable your accepted card logos to advertise support to your clients.
Limits/Fees
Here we manage any payment limits, or fees we wish to apply to any transactions. Fees and limits applied are specific to the payment type you have selected.
- Payment Type - Only the payment methods that are enabled in your payment gateway Settings pane are available to select from here. Choose one, and any fees or limits you set will be associated specifically with that payment method only.
- Min Limit & Max Limit - Enter a dollar value for the desired minimum, or maximum payment limits, and check the "Enable Min" or "Enable Max" boxes to enforce the minimum and maximum values.
- Fee Percent - Set a fee on transactions with this payment method, based on a % of the amount paid.
- Fee Amount - Set a flat rate fee for any transactions with this payment method. Can be charged in addition to the Fee Percent, if both values are set.
- Fee Cap - Set a maximum value for payment method fees charged to a client.
- Tax - When one, two, or three Item Tax Rates are enabled (Basic Settings > Tax Settings) you will see one Tax field here for each tax rate. These taxes are applied to the payment gateway fees you charge the customer.
- Adjust Fee Percent - Use the toggle switch to enable this feature. Use this when you intent to forward along the payment gateway fees to the customer. For example, if the payment processing fee for your Stripe account is 30 cents flat, and 1%, and you wanted to pass that to the customer, you would enter a 0.30 flat Fee Amount, and 1 for Fee Percent, and enable the Adjust Fee Percent. Because the total with fees will be higher, the actual fees Stripe charges will be higher also. With this feature, Invoice Ninja will calculate and adjust the fee to charge the customer the expected fee amount, after the final invoice price is changed.
- Note - When attempting to perfectly capture the payment gateway fee 100% and apply it to the client's payment using Adjust Fee Percent, you must disable Invoice Tax Rates and exclusively use Item Tax Rates (Basic Settings > Tax Settings). When a payment fee is applied to a customer invoice, it is entered as a line item, and any invoice tax rates will be applied to the fee, which will throw off the formula to calculate the new fee percent correctly.
- You are responsible for verifying that your tax and fee settings comply with any laws that apply. Seek legal counsel if you require direction on fee and tax policies for your organization.
Notes
We no longer support the PayPal Express API integration, we've updated to the "PayPal Platform" and now also support Venmo via PayPal.
Stripe

Our Stripe integration includes a wide range of payment options including:
- Card
- ACH
- SOFORT
- Alipay
- Pay
- SEPA
- Bancontact
- iDEAL
- Giropay
- Przelewy24
- EPS
- ACSS
- BECS
- FPX
- BTCPay
Our Stripe integration also includes token billing and refunds
Square
Our Square integration includes Credit Card payment options, including token billing, and refunds. Once you sign up for a Square developer account and configure your application in the Square Developer Dashoard, you will need to provide the following credentials:
- Application ID
- Access Token
- Location ID ```
The Application ID and Access Token can be found under OAuth in the left hand sidebar, and the Location ID can be found under Location in the sidebar. More information can be found in the Square developer documentation.
The test mode checkbox is available for testing Square integration with Square sandbox credentials.
Checkout.com
Our Checkout integration includes Credit Card payment options, including token billing and refunds. Enter your API public key and API secret key, provided by Checkout.com. To acquire these, sign in to or create a "The Hub" account on the Checkout.com website. Once signed into "The Hub" click on Settings from the left side menu, and then click Channels. Here you find a list of your businesses registered on Checkout.com, select the appropriate business (if you have multiple here) and you will find the API keys on this screen. For more information about Checkout.com API credentials, visit Checkout.com Docs.
- Test Mode - Enable for use when your checkout.com account/channel is running in test mode, not for live transactions or production use.
- Threeds - "threeds" is an API feature to use 3D Secure payments on Checkout.com with Invoice Ninja. 3D Secure payments add an extra step of authentication for customers when processing a card transaction. This feature reduces fraud risk, and also shifts liability in payment processing, to reduce transaction dispute claims.
Mollie

Our Mollie integration includes a wide range of payment options including:
- Credit Card (including token billing)
- Bank Transfer
- KBC
- Bancontact
- iDEAL
To setup Mollie as a payment method, you will need your profile ID #, and your website API Key. Your profile ID # can be found in the top left corner of the screen when you log in to the Mollie dashboard, and you can find a list of your API keys by clicking the Developers expanding menu on the left sidebar, and then clicking API Keys, as described on the Mollie knowledgebase. After approving your website, you will find your live, and test API keys here. There is a checkbox in the Invoice Ninja admin portal when configuring the Mollie payment gateway, to enable test mode if you are going to use a Test API Key from Mollie.
Error executing API call (422: Unprocessable Entity): No suitable payment methods found.
This error will occur when you don't have enabled payment methods in the Mollie dashboard. Navigate to Mollie > Settings > Website profiles > Select your profile > Payment methods and enable Credit card.
PayTrace

Our PayTrace integration includes Credit Card payment options, including token billing and refunds.
PayFast
Our PayFast integration includes Credit Card payment options. Here is a quick guide to help setup receiving credit card payments with PayFast
Authorize.net

Our Authorize.net integration includes Credit Card payment options, including token billing and refunds. Enter your API Login ID and Transaction Key, provided by Authorize.net. To acquire these, sign in to or create a merchant account on the Authorize.net website. After signing in, click Settings on the left side menu, then click API Credentials & Keys. From here you can view and manage new and existing API credentials. For more information about these Authorize.net API credentials, visit Authorize.net Docs.
- Test Mode - Enable for testing transactions only, use if your account is running in "test mode". For more information about test mode, visit Authorize.net Docs.
- Developer Mode - Enable for use with sandbox accounts for developers only. This is a separate account type, with no billing, and no real live transactions, and will have unique API credentials associated with it. For more information, visit sandbox.authorize.net.
- Live Endpoint - Default value is the correct HTTP address for Authorize.net API calls to a live merchant account.
- Developer Endpoint - Default value is the correct HTTP address for Authorize.net API calls to a sandbox account. For more information about API endpoints, visit Authorize.net Docs.
Braintree
With Braintree you can integrate payment support through PayPal, credit card, and debit/bank transfer. Enter your merchant ID, public key, and private key, provided by Braintree. To acquire these, sign in or create a production account on the Braintree website, and click the "gear" icon in the top right corner, which expands a drop down list. To find your public and private keys, visit API in the list, and to find your merchant ID, visit Business in the list. For more information about Braintree gateway credentials, visit Braintree Docs.
Custom
This is a developer feature (self-hosted), where you can write in your own PHP code with custom API references for your own payment gateway service provider.
Eway Rapid
Our eWAY integration includes Credit Card payment options, including token billing, and refunds. Once you have setup your business in the eWAY portal, you can find your API details under the top menu, by hovering over My Account and then clicking API Keys. Your API Key and Password for Invoice Ninja are listed near the top under Rapid API Key and your Public API Key can be found just below that under the section Pay Now Button. You can find more detailed instructions from the eWAY knowledgebase. The Test Mode checkbox will enable use with the eWAY sandbox account for payment gateway testing.
PayTrace
Our PayTrace integration includes Credit Card payment options, including token billing and refunds. To setup PayTrace you will need your PayTrace account API user credentials and API key, which can be found after successfully setting up an account with PayTrace. There is a process to go through with PayTrace involving testing a sandbox account first, before setting up live payments, make sure you use the Test Mode checkbox when going through this process with sandbox API credentials. For more information visit the PayTrace support website.
Our PayTrace integration includes Credit Card payment options, including token billing and refunds.
Digital Wallets
The below are NOT payment gateways, but rather some information on how your clients can pay an invoice via the client portal using these digital wallets. Support for this depends on your payment gateway (ex. some gateways don't support Apple Pay or Google Pay, etc.)
Apple Pay & Google Pay
As of this moment, to pay with Apple or Google Pay a credit card needs to already be configured in your browser. This is not Invoice Ninja preference, but a platform choice.
Safari on desktop:
- Safari on Mac running macOS Sierra or later
- A iPhone (iPad isn't supported yet) with a credit card configured in Wallet. More info can be found on Apple's support site.
Safari on mobile:
- iOS 10.1 or later
- A card configured in the Wallet app
Google Chrome:
Microsoft Edge:
- Microsoft Edge 16.16299 or newer
- A saved credit card
Crypto
BTCPay
The integration of BTCPay Server with Invoice Ninja enables you to accept bitcoin as a payment method, without fees, intermediaries with payments going directly to your bitcoin wallet.
CBA PowerBoard
To integrate with the Commonwealth Banks PowerBoard gateway you can use the following steps:
API Credentials
The first step will be to log into your PowerBoard portal and retrieve your API credentials.
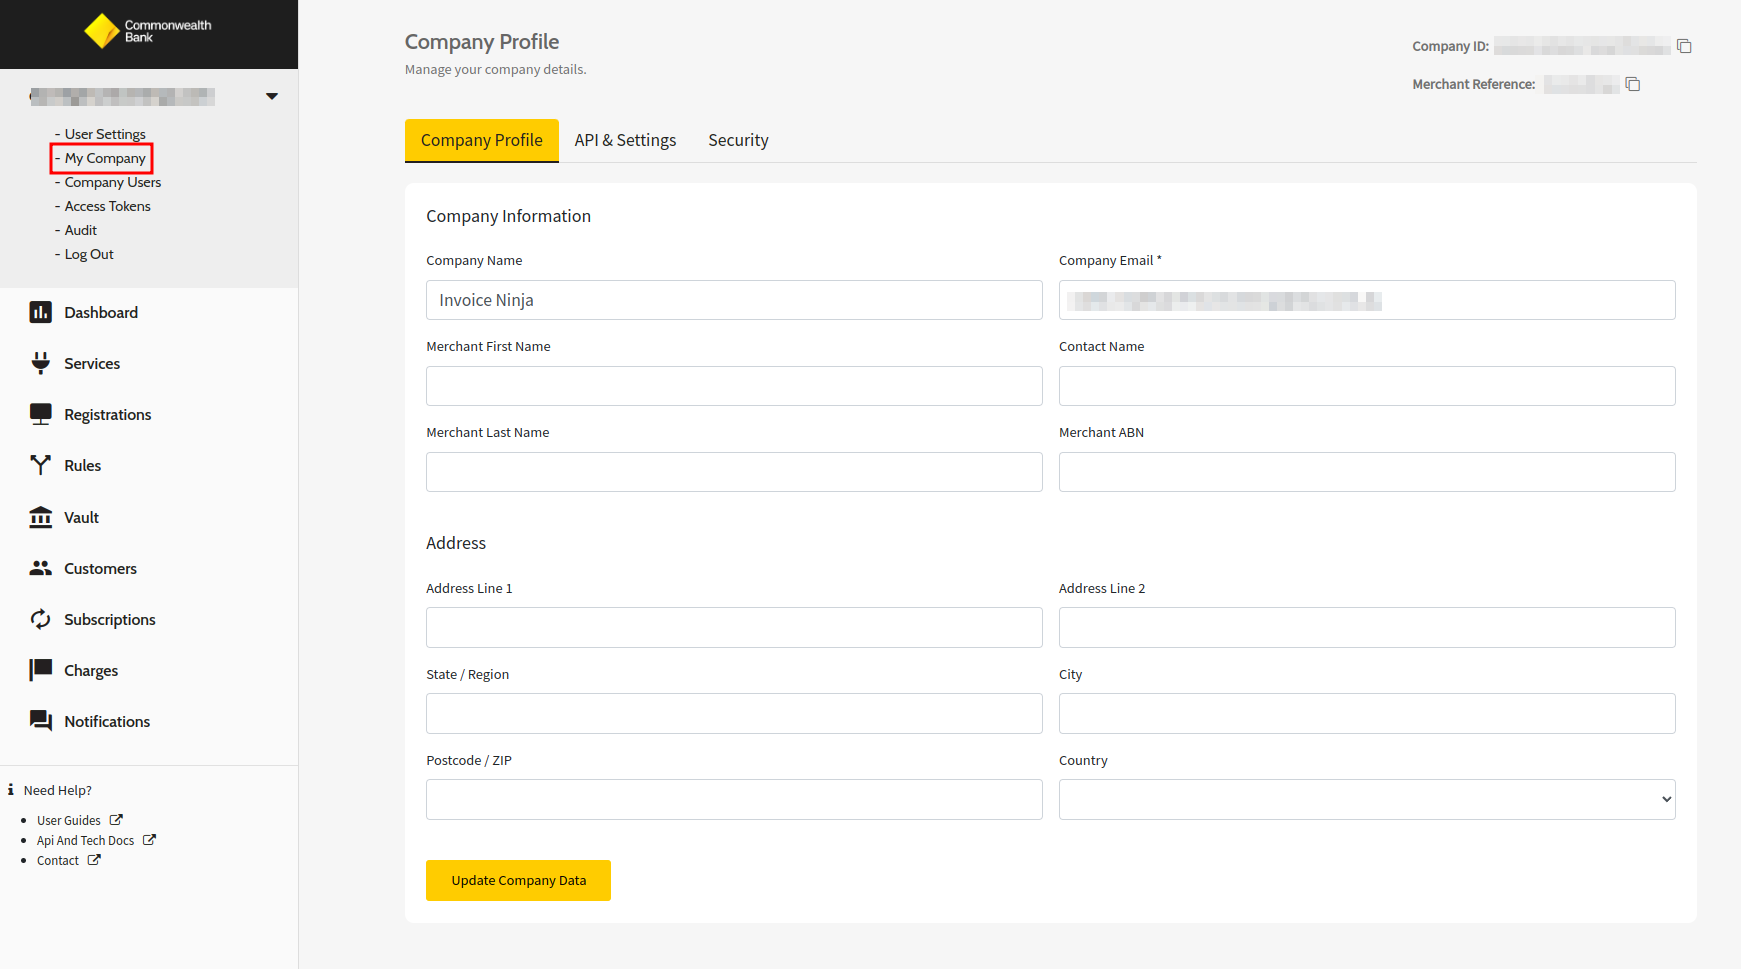
Then navigate to the My Company link and click on API & Settings
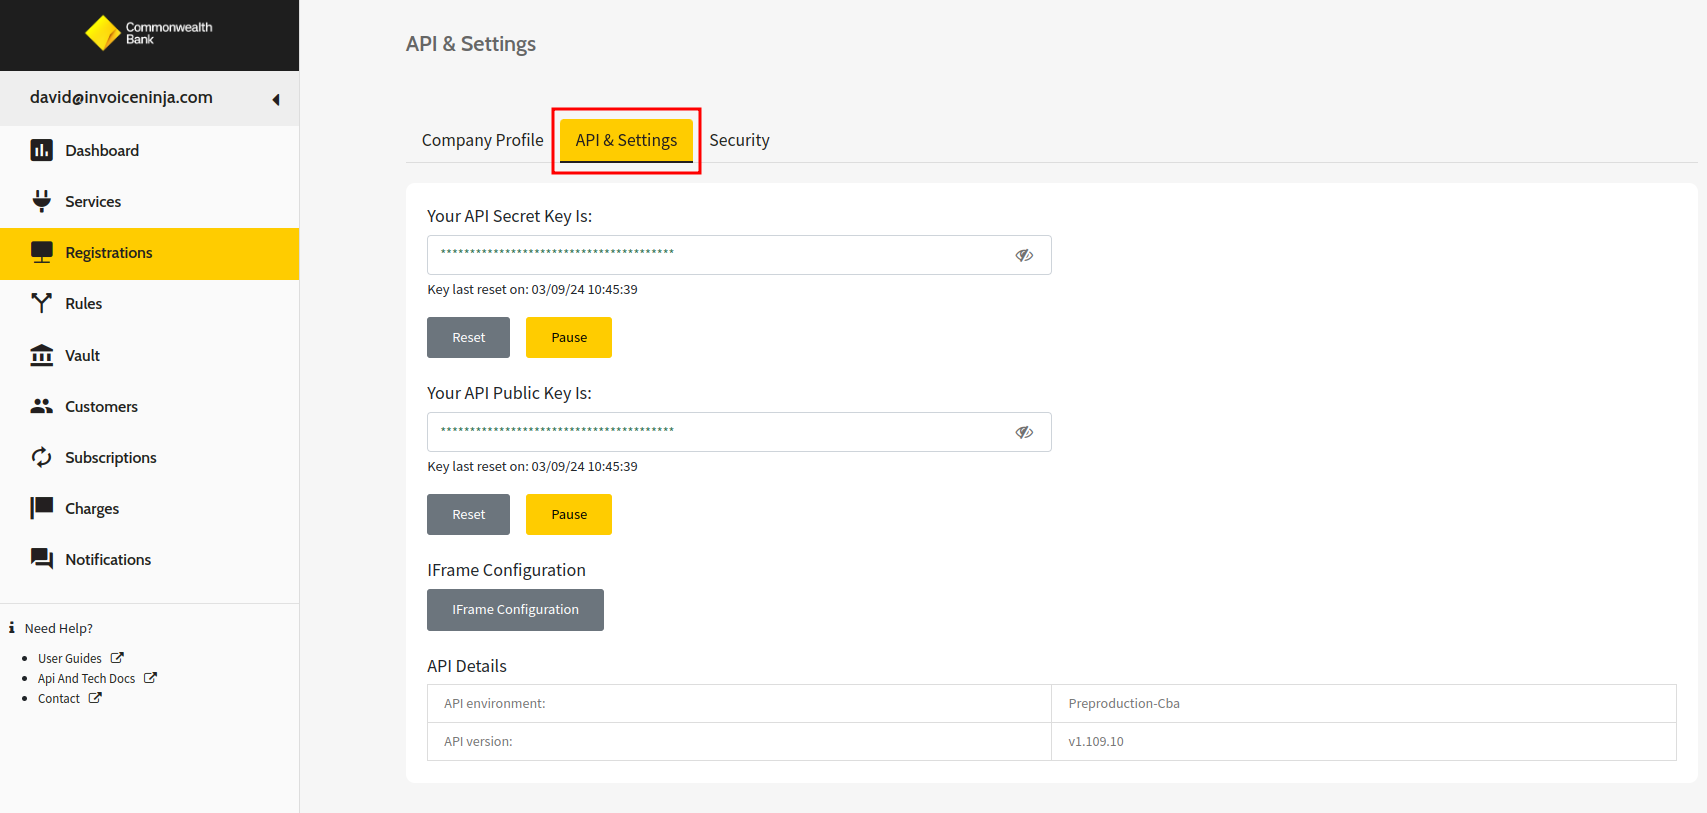
You'll want to copy the API Secret Key and API Public Key values and then click on the Services sidebar menu option to find your Credit Card Gateway ID.
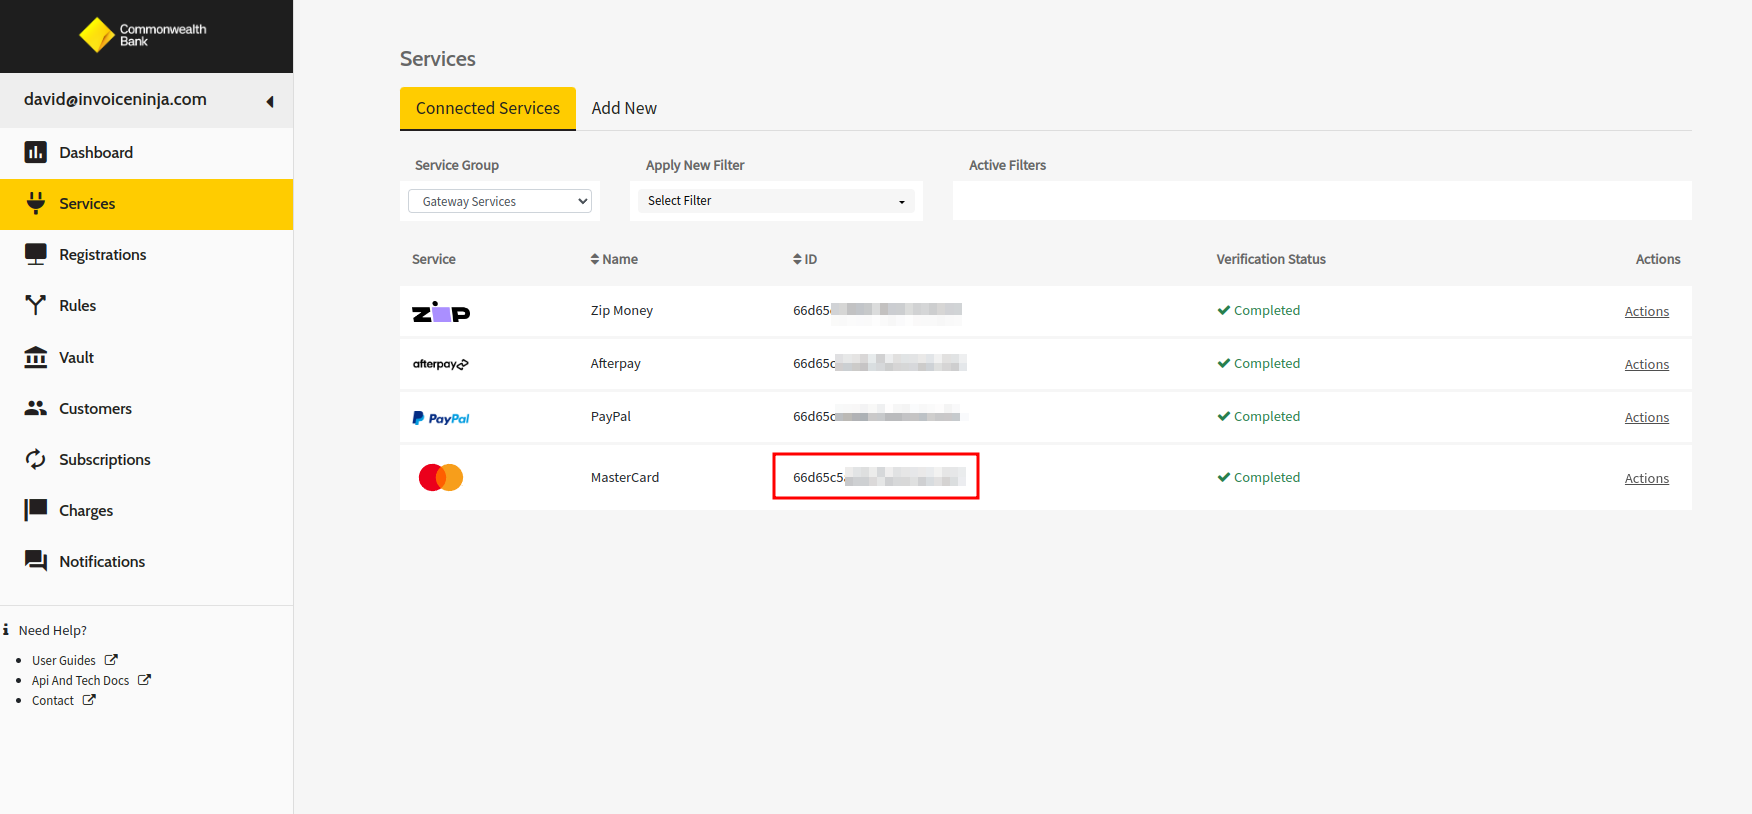
You'll want to copy the ID value highlighted adjacent to your Credit Card Service Provider.
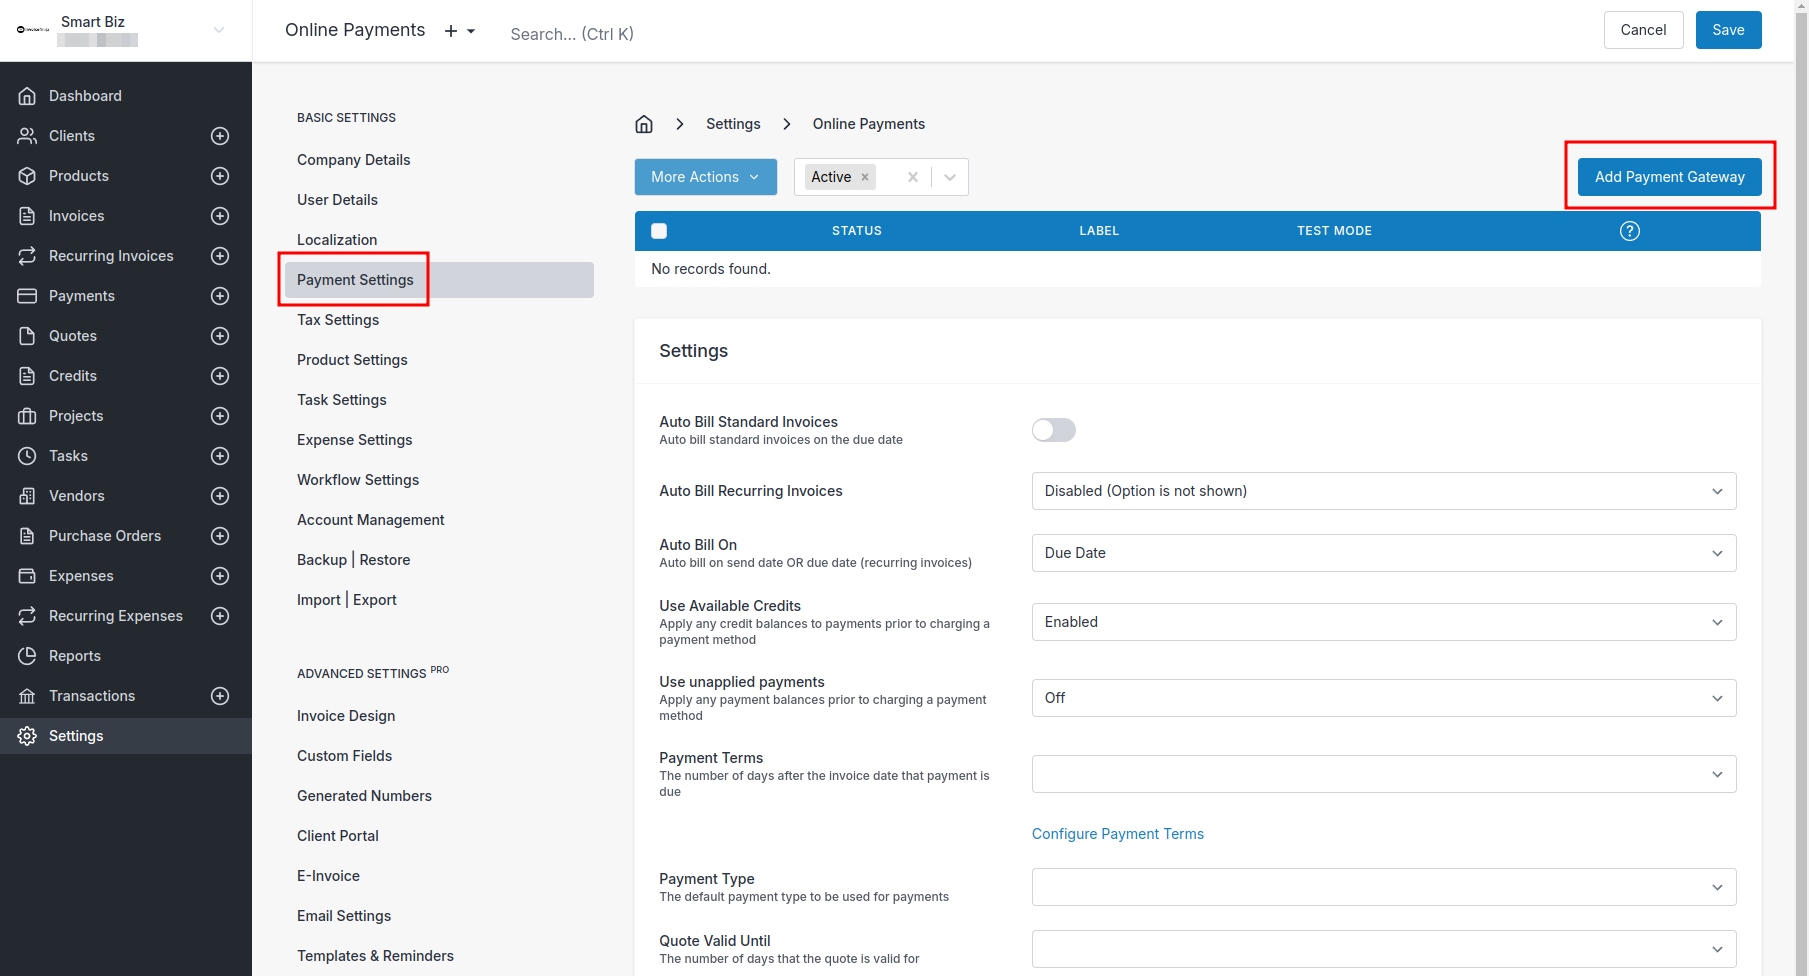
Invoice Ninja + PowerBoard
Back in Invoice Ninja, navigate to Settings > Payment Settings; create a new Payment Gateway and select CBA PowerBoard from the drop down.
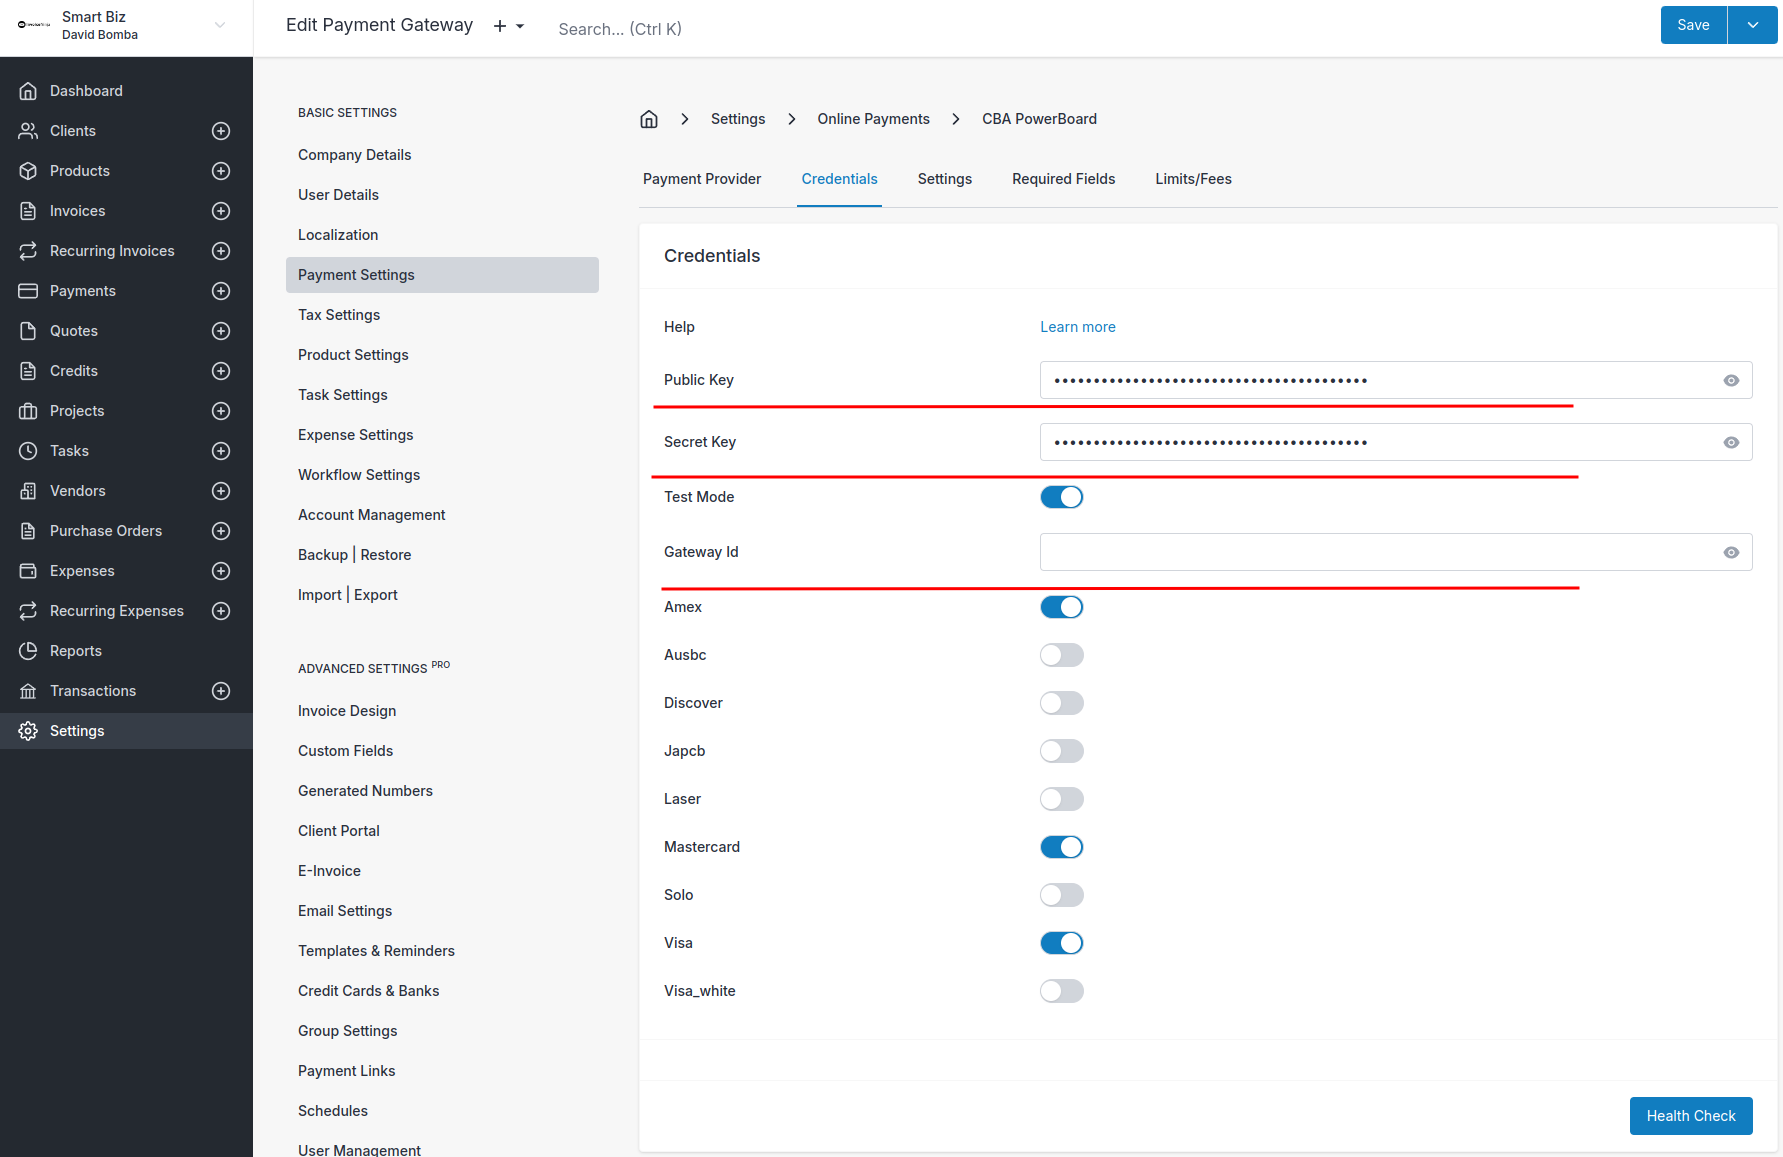
In The Credentials tab, you can copy in the Secret Key / Public key and the Gateway ID from the previous step.
Further down, you will see some toggles which can control the card types you would like to accept payments from, you can enable/disable these as needed.
Advanced Settings
Now that your PowerBoard gateway is configured, you can explore a range of features / options you can use with this gateway!
More reading:
Want to contribute? Edit this page on GitHub!