Projects
The Projects module is useful for managing large collections of work for clients. A project record itself is simple, but its functionality and usefulness come from the records linked to it. By linking Tasks and Expenses to a project, you can stay organized and plan the work for your client. You can also link a project to a User in the admin portal to maintain accountability.
You can assign multiple tasks and expenses to a project, but it is not required. Tasks represent billable hours and assigning them to a project with a Task Rate set, allows you to create a default hourly rate. Expenses represent goods or services you had to pay for. Assigning expenses to a project helps you keep track of them when it's time to bill your client for the completed project.

Viewing a Project
From the Projects module, select any project from the table to bring up the project overview page.
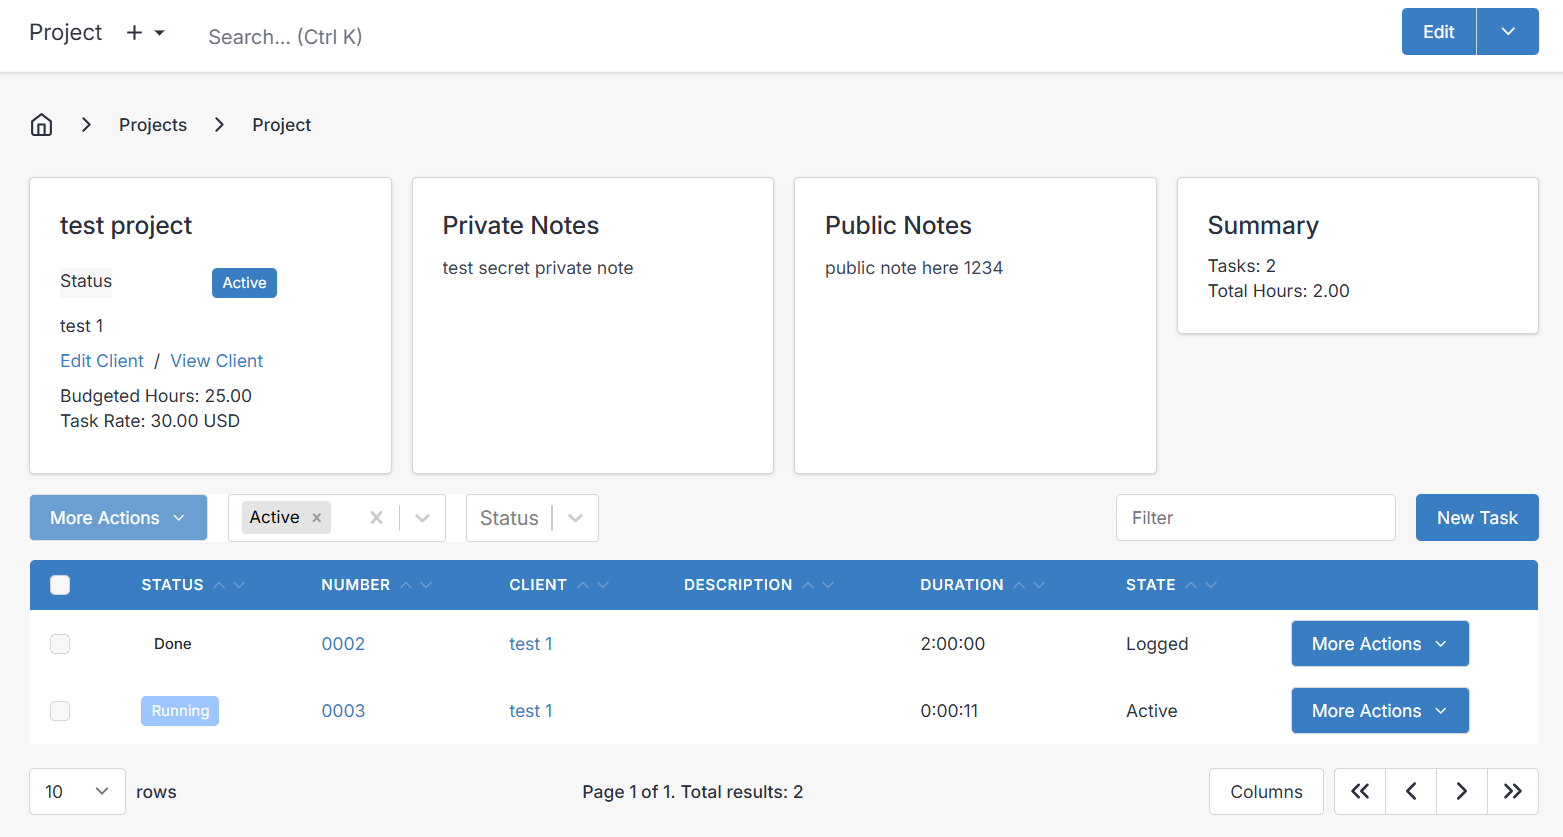
The screen displays the Total hours and Budgeted hours for the project. The Total hours are the sum of all tasks in the project, allowing you to see the progress of the work relative to the budgeted hours.
You can also see the Client and User assigned to the project, as well as the number of linked Tasks and Expenses. Additionally, you can see the project Due Date and default Task Rate for linked tasks.
Public and private notes are also displayed with different icons.
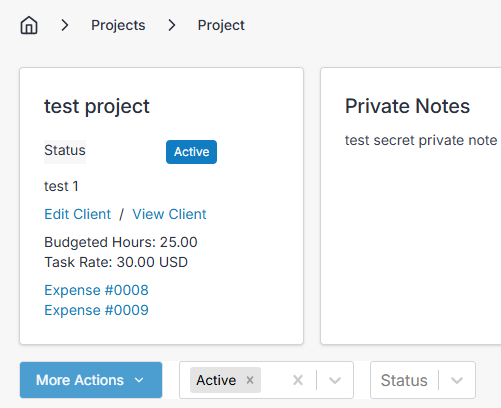
If there are any expenses linked to the project, they will be shown as links:
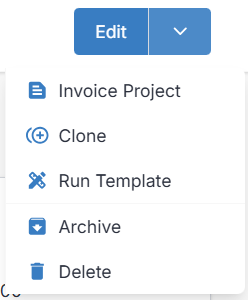
The dropdown arrow menu at the top right corner of the screen offers the option to invoice the project (create an invoice to the client from the project), clone the project, run the project as a template, and archive or delete the project.
Tasks
On the right of the view project page above the tasks table, you have an option to create a New Task which will shortcut you to creating a task that is already prepared to be linked to the project you were viewing. The other button at the bottom is Invoice Project which takes you to a new page to create an invoice, already prepared with any unpaid tasks that are assigned to the project.
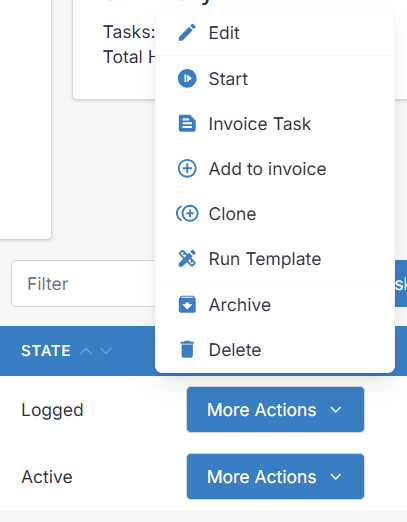
Each task in the project has a More Actions dropdown which provides options related to the specific task selected:
To learn more about task time tracking/statuses, see: Tasks
Creating and Editing a Project
Creating and editing a project is simple. Most of the functionality comes from the records linked to it, such as tasks and expenses, making it easy to bill the client for all related work. The customizable fields are:
- Project Name: The name of the project, which is included in the line item description of the first task in the invoice when creating it from the project.
- Project Number: An automatically generated number for record keeping purposes.
- Client: Assign the project to a client.
- User: Assign a user to the project to maintain accountability and responsibility.
- Due Date: Assign a due date to stay focused and track progress.
- Budgeted Hours: Set a budget for billable hours based on estimation and client agreement.
- Task Rate: Set a default rate for billable hours in new tasks, which can be overwritten later.
- Public Notes: Add notes for perspective and client records.
- Private Notes: Add notes to be shared with coworkers who have access to the admin portal.
Documents
You can upload files, such as images, documents, and more under the Documents tab. Like most other modules, files uploaded under the documents tab of a project can be viewed by the client through the client portal under the Documents section > Projects tab.
Invoicing a Project
Once you finish working on a project, it is time to bill the client for the total hours.
Simply select the Invoice Project option from the project Edit or More Actions dropdown.

The New Invoice page will be pre-filled with the project's client, and the project's tasks will be added under the invoice's Tasks section. The ## and <div> in the description are intentional - used to apply CSS formatting.
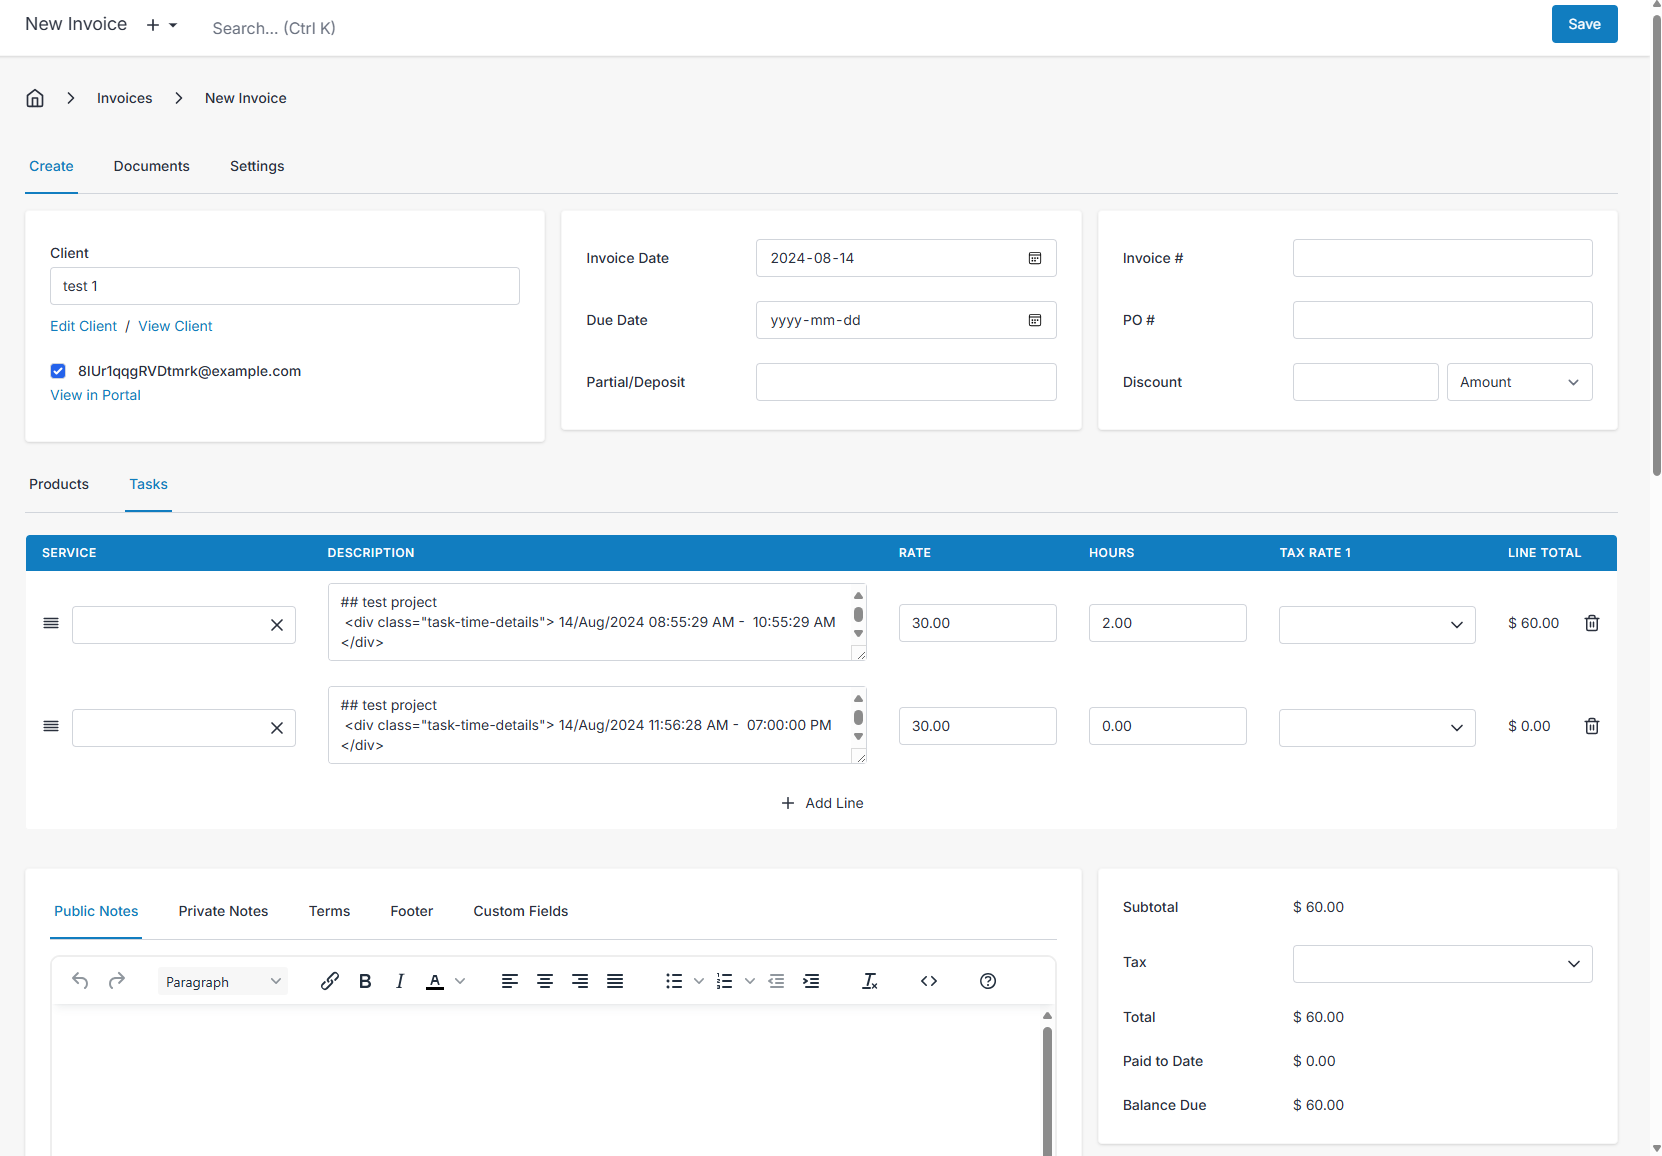
Note: expenses linked to a project won't be included on the invoice that is created from a project. If you want to bill your client for project expenses, they will have to be added manually to the invoice as items.
Want to contribute? Edit this page on GitHub!