Recurring Invoices
Recurring invoices are a convenient way to automate the process of billing a client on a regular schedule. You can set a recurring invoice to be generated automatically at a specific interval and sent to your client via email. This feature is useful for businesses that have regular clients and bill them on a regular schedule, such as monthly or annually. It saves time and effort by automating the invoice creation process.
How to initiate a Recurring Invoice?
Simply select New Recurring Invoice and fill in your products like on any regular invoice. The only difference is:
- You can use special keywords for automatic date range calculations in the product descriptions
- Select how often the invoice will be automatically created & sent (Frequency, Remaining Cycles).
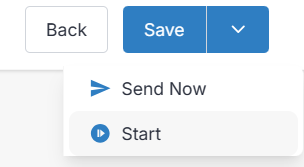
Once you filled in your recurring invoice (see details on every option below), you will need to press Save and then Start.
Recurring Invoice Statuses
- Draft: This is the status when you save a recurring invoice but haven't yet started it. Nothing will be sent out until you Start it.
- Pending: The recurring invoice changes to Pending once you have selected Start. It has not been sent yet.
- Active: The recurring invoice is active and still has remaining cycles to be sent. At least one invoice has already been sent.
- Paused: The recurring invoice has been stopped and won't be sent until you Start it again.
- Completed: There are no more remaining cycles left in the recurring invoice to bill for.
- Archived: Archived status.
- Deleted: Deleted status.
Frequency
Select how often the recurring invoice is to be sent.
Start Date
Select the start date for the recurring invoice (defaults to today). This is the date the first invoice will be sent once you start the invoice.
Remaining Cycles
Choose how many cycles the recurring invoice should be sent for, or Endless.
Due Date
Select the due date for the recurring invoice (calculated from the date it is issued).
Discount
Optionally enter a discount amount or percentage.
Enter your products/tasks
The products/tasks entry is the same as for regular invoices & quotes. Since this is a recurring invoice, you have the ability to use special keywords in the description field. You can also configure notes, terms, footer, link a project, set exchange rate, taxes, etc. the same way as on regular invoices. See Invoice Items
Auto Bill options
When configuring a recurring invoice, you have a variety of options of how Auto Billing can be enabled. There are 4 options:
- Enabled
- Opt-Out
- Opt-in
- Disabled
Enabled
When set to Enabled it means that the recurring invoice will always be auto-billed if a valid payment method is on file.
Opt-Out
When set to Opt-Out - a radio checkbox will appear during the payment process. This checkbox will allow the user to opt in or opt out from auto-billing. With this particular setting, the radio button will be pre-selected to ENABLED auto-billing.
Opt-In
When set to Opt-In - a radio checkbox will appear during the payment process. This checkbox will allow the user to opt in or opt out from auto-billing. With this particular setting, the radio button will be pre-selected to DISABLE auto-billing.
Disabled
When set to Disabled it means that the recurring invoice will never be auto-billed.
More Actions
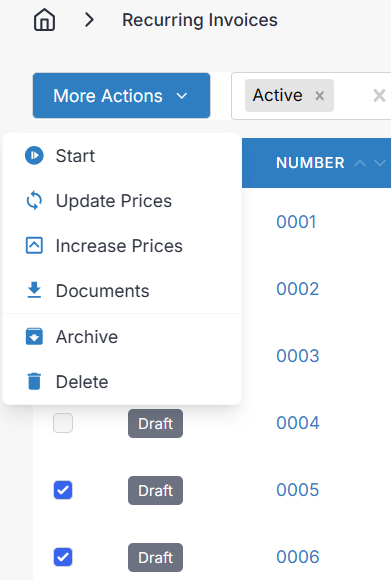
If you either select invoice(s) from the Recurring Invoices home page, or you select More Actions while editing a Recurring Invoice, you will have these options:
- Start: Only shows up if you have selected Draft recurring invoice(s). This will start the invoice.
- Stop: Only shows up if you have selected Active recurring invoice(s). This will stop the invoice and change the status to Paused. It won't be sent again util you Start it again.
- Update Prices
- Increase Prices
- Documents
- Archive: Archives the recurring invoice. Does not affect already generated invoices.
- Delete: Deletes the recurring invoice. Does not affect already generated invoices.
- Restore: Only shows up if you have selected an archived or deleted recurring invoice. Once you restore a recurring invoice, it will attempt to catch up - sending every hour until caught up.
Update Prices
This option will check all the products on the recurring invoice against the Products list in Invoice Ninja, and update the prices on the recurring invoice to match the current product price. For example, if you updated the price of an item you sell and need the price change to reflect on recurring invoices generated from now on.
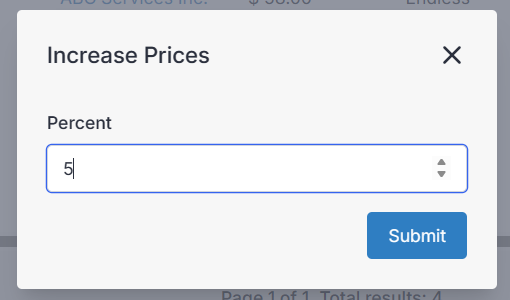
Increase Prices
This option allows you to increase the prices of all items on the recurring invoice by a percentage.
Click a Recurring Invoice for overview
On desktop if you click on a recurring invoice row (not the invoice number), it will open a pull-out on the right with Overview, History, Schedule, and Activity options.
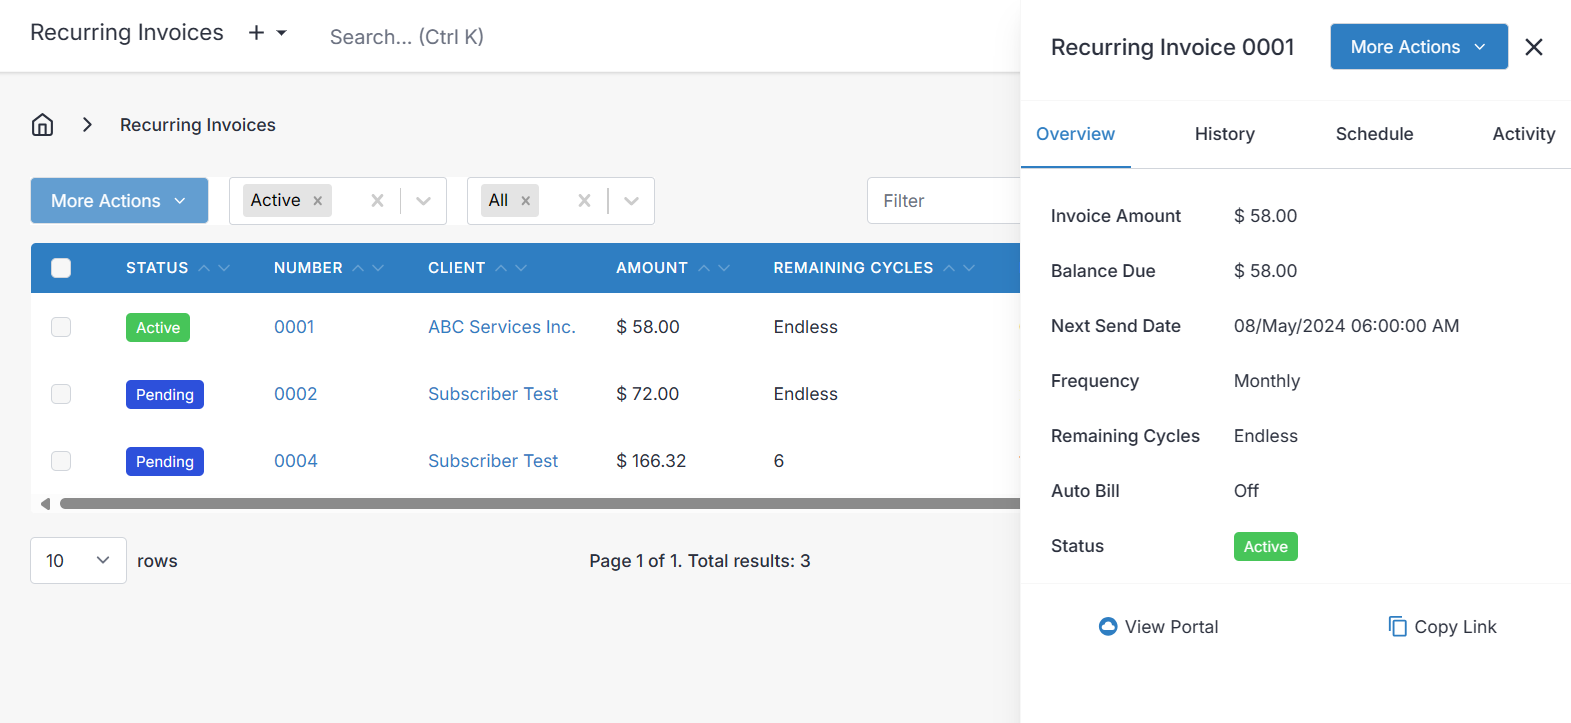
From the overview panel, you will see general information about the recurring invoice. The amount of the invoice, balance owing, next send date, frequency, remaining cycles, status of Auto Billing, and Status.
History
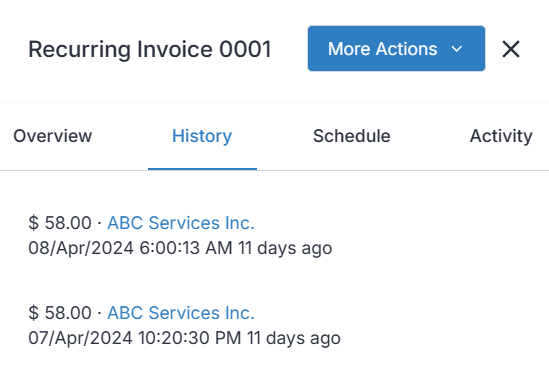
The History panel presents a chronological overview of dates the recurring invoice was sent, and shows the total amount of each invoice created.
Schedule
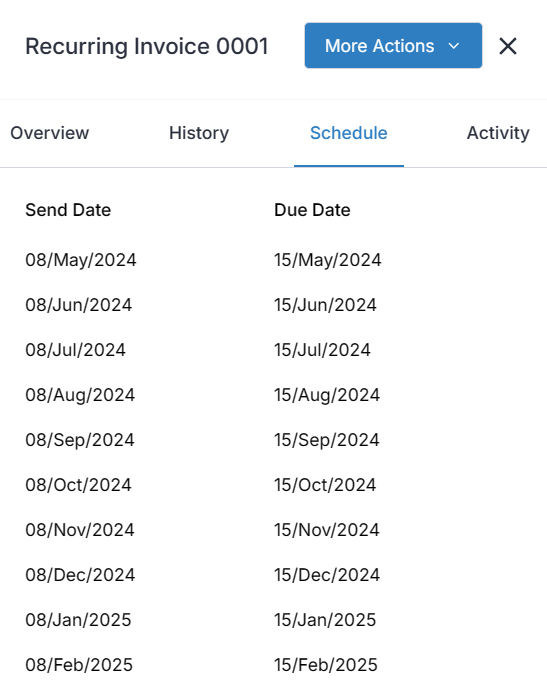
The Schedule panel presents calculations for the upcoming dates the recurring invoice will be sent out (based on the Frequency, Start Date, and Remaining Cycles), and the due date based on the Due Date setting.
Activity
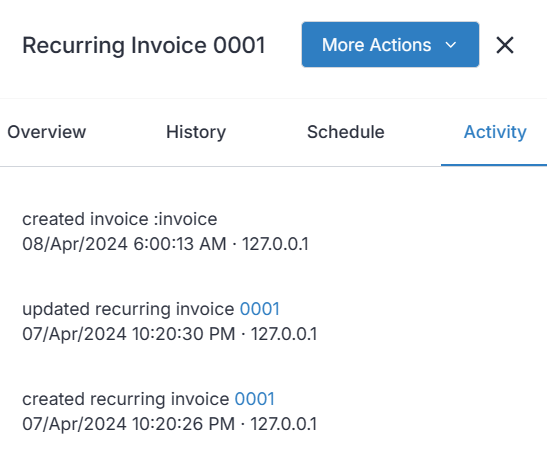
The Activity panel presents a chronological overview of any actions performed against the invoice, including when it was created, edited, stopped, updated, etc.
Reserved keywords in the items description
To make your life easier, we've put together few reserved keywords in the line items description to make your work with recurring invoices, much easier.
Reserved keywords are:
- :MONTH
- :YEAR
- :QUARTER
- :WEEK
- :WEEK_BEFORE
- :WEEK_AHEAD
- :MONTHYEAR
As you may guess, each time the recurring invoice (PDF) is generated, keywords will be replaced with actual value, so:
- :MONTH will get translated to real month (e.g. January).
- :YEAR to the numeric value of the current year (e.g. 2024)
- ...and the :QUARTER to e.g. Q2.
:MONTH, :YEAR, :QUARTER :MONTHYEAR keywords also support basic mathematical operations: addition, subtraction, multiplication & division.
So this is the pattern for mathematical operations:
%KEYWORD% %OPERATION% %VALUE%
Let's see it in practice. Imagine you're sending an invoice for a gym membership every three months. Write this in item description & let's see what we get:
Gym membership: :MONTH to :MONTH+3
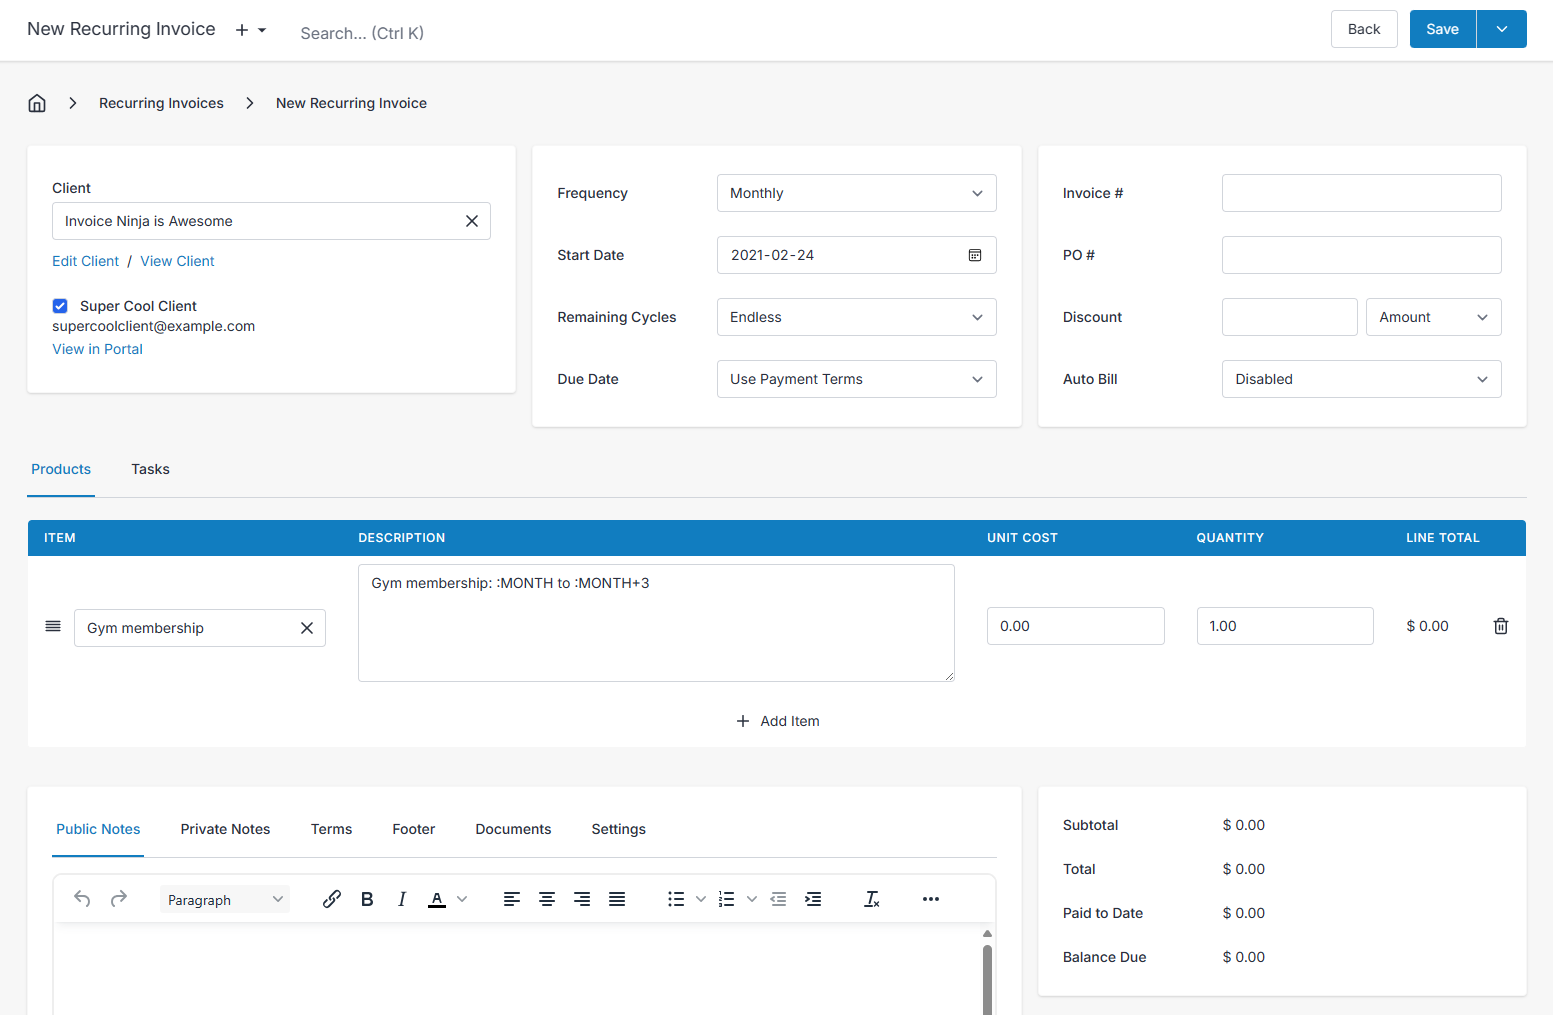
... and let's save & preview the invoice:
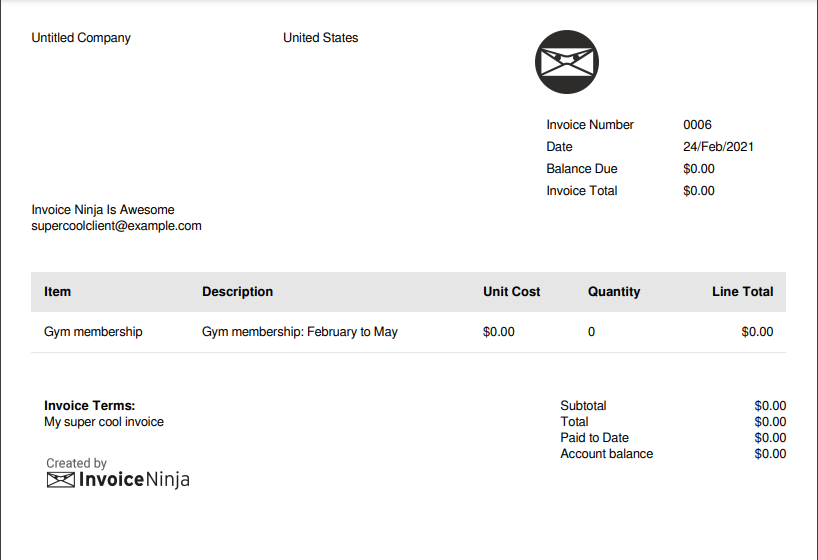
Nice! Now, each time you send this invoice, you don't have to put the exact month, nor the upcoming month.
Supported combinations
Month: :MONTH
Year: :YEAR
Quarter: :QUARTER

:MONTH (+, -, *, /) e.g. :MONTH+1 :MONTH-1 :MONTH*2 :MONTH/2
:YEAR (+, -) :YEAR+1 :YEAR-1
:QUARTER (+, -) :QUARTER+1 :QUARTER-1
:MONTHYEAR (+, -) :MONTHYEAR :MONTHYEAR+1
Reserved keyword for date ranges
Previously listed keywords are super cool, but what if we have to generate for example:
Gym membership: February 2021 to February 2023
It's easy as typing following:
Gym membership: [MONTHYEAR|MONTHYEAR+24]
Gym membership: February 2021 to February 2023 🎉
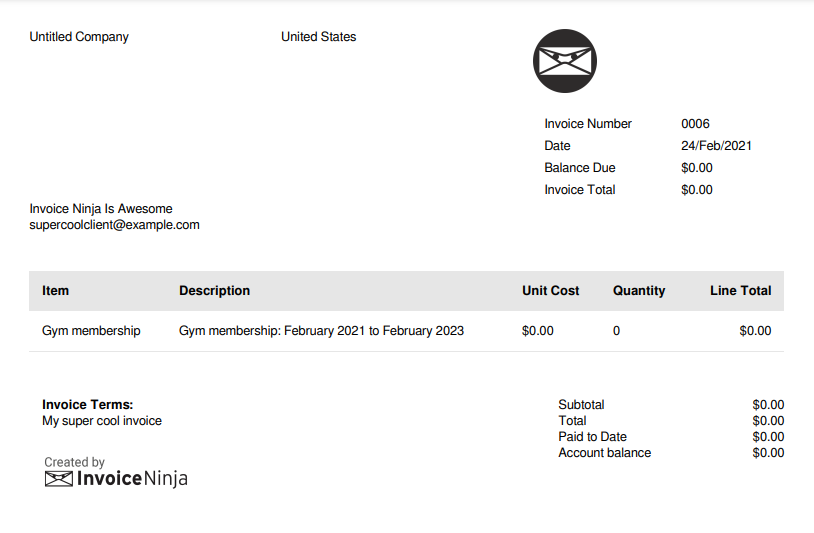
Another way to do it this:
Gym membership: :MONTH :YEAR to :MONTH :YEAR+2
Keep in mind that [MONTHYEAR|MONTHYEAR] syntax will take care of overlapping dates.
Supported combinations
[MONTHYEAR|MONTHYEAR +, -], [MONTHYEAR|MONTHYEAR+16], [MONTHYEAR|MONTHYEAR-2]
Translations
As you can see [MONTHYEAR|MONTHYEAR] uses "to" between date ranges. This is not hard coded, but it builds itself based on your localization settings.
Want to contribute? Edit this page on GitHub!