Recurring Expenses
A recurring expense is a template for a cost that keeps coming back — office rent, a software subscription, your accounting tool, the monthly cloud bill, a standing order with a supplier. Instead of re-entering the same figures every month, you set the details once and Invoice Ninja generates a fresh expense record each cycle, on whatever frequency you choose.
It is the same pattern as Recurring Invoices, pointed the other way. Recurring invoices bill your clients on a schedule; recurring expenses record what you pay on a schedule. If you have ever set up a monthly retainer invoice, you already know how this works.
Reach for it when a cost is predictable enough to automate. If the amount, frequency, and vendor stay roughly the same from one period to the next, a recurring expense will keep your books accurate without you having to remember. When a generated expense needs to be billed back to a client, enable Should be Invoiced and it will flow through to their next invoice just like a one-off expense.
Recurring Expenses Module View
The Recurring Expenses module displays a table view of all available expense records. You can sort and filter the records by using the options at the top of the table. The status dropdown allows you to change the visible records. Each entry in the table has a More Actions menu on the right that provides options for managing the record, such as editing and cloning.
Viewing a Recurring Expense
To view a recurring expense record, click its number from the table. The edit panel appears, where you can manage the record.
More Actions dropdown
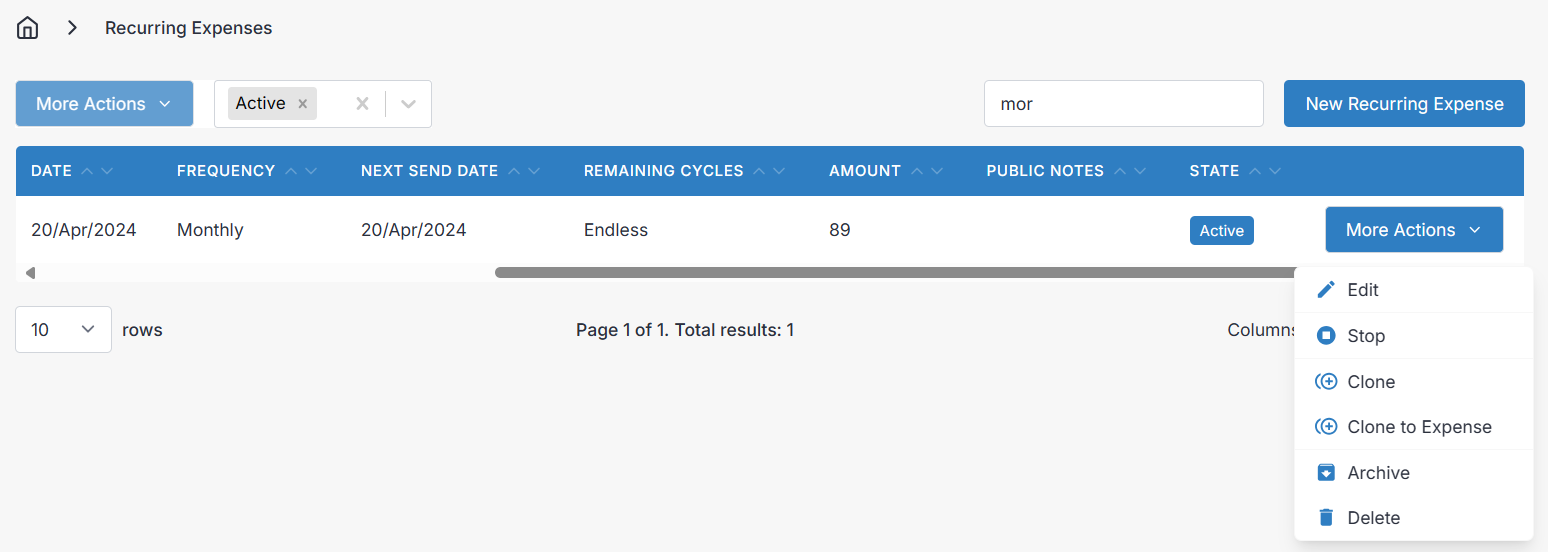
From More Actions you can Start or Stop the billing cycle at any time — handy when a subscription is paused or a supplier contract is on hold. Clone creates a new recurring expense pre-filled from the original, so setting up a second, similar subscription takes seconds. Clone to Expense does the same thing but produces a one-off expense instead of a recurring one, which is useful when you need to log a single out-of-cycle payment.
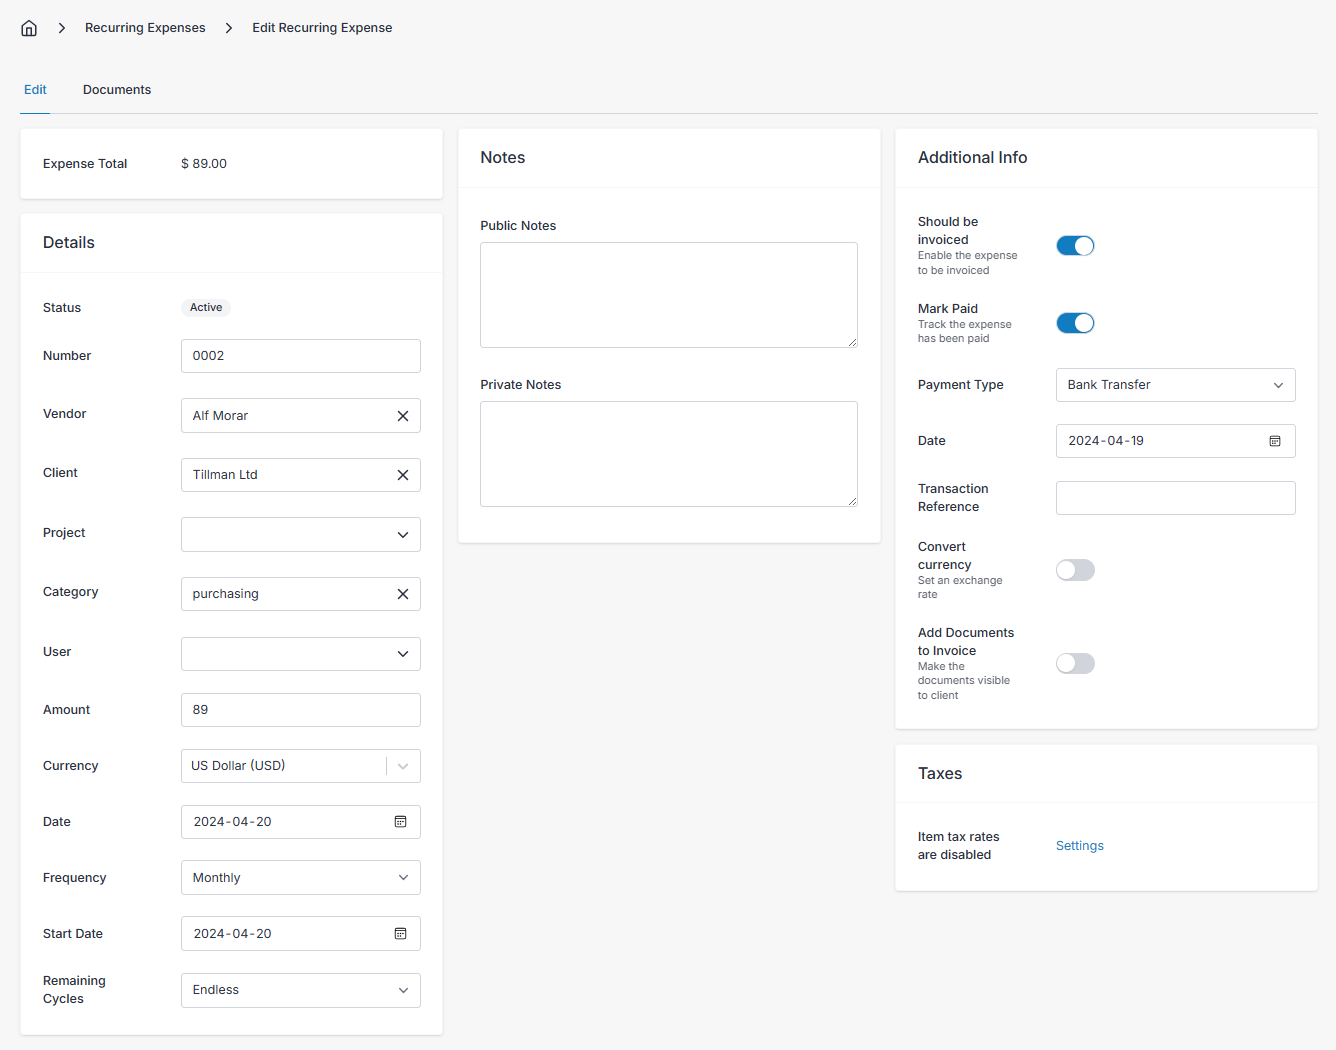
Details
- Number - The expense number is best left alone, so it can be automatically generated by Invoice Ninja. The policies governing generated numbers can be found in Settings > Generated Numbers.
- Vendor - Link the expense to a vendor by selecting an available vendor record from the list here. See Vendors for managing the businesses you buy from.
- Client - Link the recurring expense to a client by selecting an available client record. When creating an invoice from a recurring expense, the new invoice will also be automatically assigned to this client.
- Project - Assign a recurring expense to a project from the list. The projects list is filtered by projects assigned to the client, if one is chosen, and the appropriate client is automatically assigned when you select a project.
- Category - Categories are optional, to help add another level of sorting to your expenses and recurring expenses. There are no default expense categories, so if you wish to make proper use of this field, you will have to create a list of expense categories in Settings > Expense Settings > Configure Categories.
- User - Optionally assign the expense to an admin portal user to be recorded as the creator of the recurring expense.
- Tax - Select an applicable tax rate. Tax rates are configured by you in Settings > Tax Settings > Configure Rates.
- Amount - The total cost per cycle of the recurring expense.
- Currency - Currency you pay your expense in, automatically populated with the default currency of the vendor assigned to the recurring expense.
- Date - Initial date of the recurring expense initiated with your vendor.
- Frequency - How often you are billed — weekly, fortnightly, monthly, quarterly, annually, and so on. Pick whatever matches your agreement with the vendor.
- Start Date - Select a date to indicate the beginning of the billing cycle. Future bills will be based on the cycle frequency and start date.
- Remaining Cycles - By default, "Endless" is selected, which suits open-ended subscriptions. For fixed-term agreements like a twelve-month software licence, set the number of cycles and Invoice Ninja will stop generating records once the term is up.
Notes
- Public Notes - Use this field to describe the recurring expense. When creating an invoice for a client from a recurring expense, the public notes are included in the line item description for the recurring expense.
- Private Notes - The value of this field is only viewable by users of the admin portal, so you can use it to make notes to yourself and other coworkers about the recurring expense record.
Additional Info
- Should be Invoiced - Enable this to mark a recurring expense as billable to a client. Recurring expenses with invoicing enabled can be included on client invoices, and when you create an invoice from a project that the invoicable expense is linked to. When a recurring expense record has invoicing enabled, its lifecycle status will change.
- Mark Paid - Enable this to indicate that your organization has last paid the vendor for the recurring expense.
- Payment Type - Select the payment type your organization used to pay the vendor with.
- Date - Enter the date your organization paid the vendor.
- Transaction Reference - Enter a transaction reference code or number if applicable.
- Convert Currency - If the recurring expense is billed in a currency other than your own default currency, enabling this allows you to set the currency you prefer to pay with, and an exchange rate, to calculate how much the recurring expense cost in your preferred currency.
When you view your reports, recurring expenses are categorized by the currency of the expense/vendor, not the currency selected under "Convert Currency". If you want to consolidate your profit and loss totals under one currency, select your own currency for each recurring expense and use the converted amount for the expense amount, leaving any reference to a foreign currency out of the record's details.
- Add Documents to Invoice - Enable this feature to include any documents attached to a recurring expense, with the documents attached to the invoice when you create an invoice out of the recurring expense record.
- Enter Taxes - Configure how the recurring expense is taxed to you in more detail.
- By Rate or By Amount - Change between rate or amount to change the Tax field (under the details tab) from a percent based tax, to a custom flat tax.
- Inclusive Taxes - Enable this option if the taxes are inclusive to the cost of the expense, rather than exclusive. For example: Exclusive tax is applied on top of the expense cost, like so: 100 + 10% = $110 total (100 + 10). Inclusive tax is when taxes are deducted from the amount the vendor bills you, and included in your expense amount, rather than tacked on top of what you pay the vendor, like so: 100 + 10% = $100 total (90.91 + 9.09).
Documents
The Documents tab supports uploading files such as documents, pictures, and more to allow you to share them with the client when attached to an invoice (when enabled) or with other users of the admin portal. Attaching the original contract or a sample invoice from the vendor here keeps the paperwork alongside the record.

Schedule
A simple list of future dates for the cycle of the recurring expense is shown here, so you can confirm at a glance when the next record will be generated.
Creating and Editing a Recurring Expense
In the desktop layout, editing or creating a recurring expense takes you to a new screen with all available fields displayed at once. In the mobile layout, editing or creating a recurring expense opens another screen with tabs, organized similar to how they appear in the desktop layout, as described above.